Add Watermark to PDF on Mac Using Preview & It’s Alternatives

Summary :
Many users search “add watermark to PDF in Preview” only to discover that Preview doesn’t offer a built-in watermark feature. If you’ve been scanning toolbars for a “Watermark” button—don’t worry, there’s still a way.
Table of Contents
Add Watermark to PDF on Mac
Can’t find a watermark tool in Preview? You’re not alone—Preview doesn’t include one. Instead of direct watermarking, you can simulate a watermark in Preview by inserting styled text.
But if you’re looking for more control or want to process multiple files, there are better tools. Here’s how to choose the right method based on your needs:
● Want a simple watermark on one page? Use Preview itself to insert text and style it to look like a watermark.
● Need styled watermarks on multiple pages? Choose a full-featured PDF editor like PDFgear. It lets you create proper watermarks with options for font, image insertion, positioning, and transparency.
● Want to batch watermark files with images? Try Automator, a built-in automation tool on macOS.
To make your watermark harder to remove, you can use the Print > Save as PDF option in both Preview and PDFgear. This flattens the watermark to make it permanent and prevent unauthorized deletion.
Add Watermark to PDF in Preview: Fake One
Preview is a pre-installed program on macOS devices, with which you can easily review and mark up PDFs without software download.
Though Preview doesn’t directly support watermarking, there’s a workaround – add and format text to make it look like a watermark.
Here’s How to Fake a Watermark to PDF in Preview:
1. Open the PDF: Open the PDF with Preview and navigate to “View” menu, then enable “Show the Markup Toolbar”.
2. Add Text and Customize the Appearance: Click the text icon to insert a text box on your PDF, and adjust the font, opacity, size and color until the text looks like a watermark.
4. Duplicate the watermark: Copy the styled watermark and paste it multiple times in other places to cover and secure the whole content.
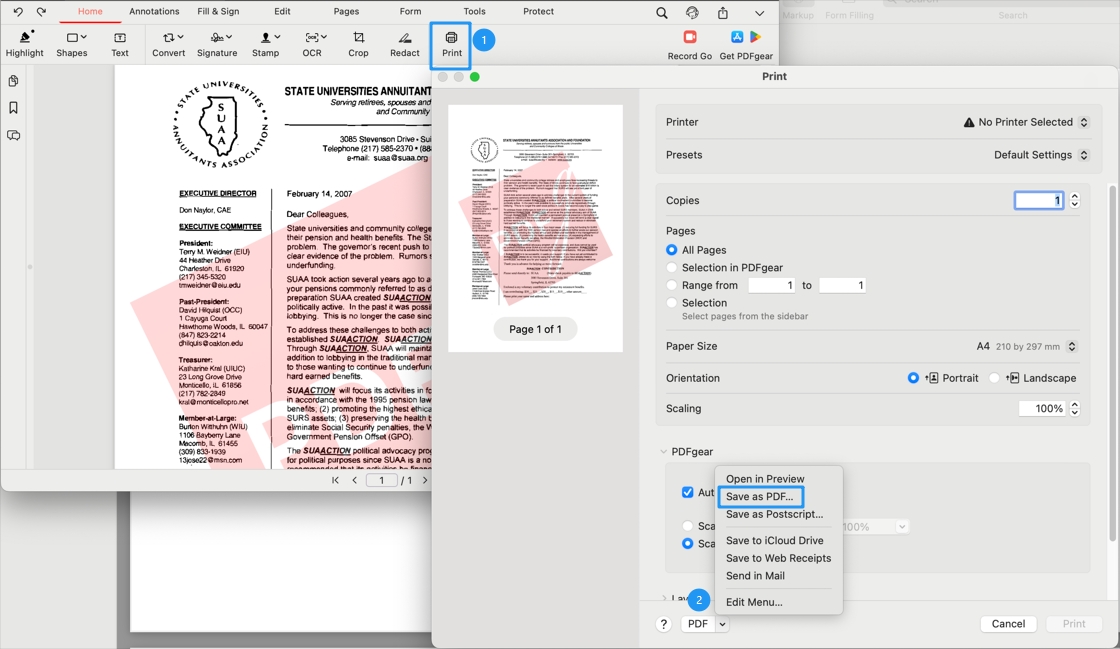
5. Secure the watermark and Save: If you want to make your watermark unremovable, go to File > Print, then choose Save as PDF from the PDF menu at the bottom of the window.

Fake a Watermark to PDF in Preview
This method simulates watermarking visually. It’s fine for lightweight use, but a few watermarks are often not enough to cover the full extent of a PDF page, let alone all the pages in a document.
If you’re looking for more flexibility, and speed, especially when working with multiple pages, it’s time to switch to a dedicated PDF editor like PDFgear. It gives you full control over styling and placement.
Add Text/Image Watermark to PDF with a PDF Editor – PDFgear
Those who want precise control over watermark styling, PDFgear is ideal for them. It offers a fully featured solution for free. Whether you’re using Windows or macOS, you can use the PDFgear software to insert text- or image-based watermarks with customizable style, opacity, and placement.
Here’s how to do it:
Step 1. Download and launch PDFgear software, and open your PDF with it.
Step 2. Go to Edit, choose Watermark, and click Create Watermark.
Step 3. Select a watermark source by typing text or selecting an image from your device. Customize how the watermark looks. Set the page range where you want the watermark to appear, then click OK.
Add Brand Logo to PDF With PDFgear on Mac
Step 4. Secure the watermark. Click Print, then select Save as PDF. This will flatten the watermark into the document, preventing others from removing it.
Virtual Print the PDF to Make PDF Watermark Uneditable
Whether you want to add a watermark text that says “For internal use only” or a brand logo image watermark on multiple pages, PDFgear can help you quickly achieve the desired watermark effect, enhancing the professional appearance of your documents.
More Tips to Secure Your PDF🔒
In addition to watermarking, PDFgear also offers tools to help you keep your documents secure and tamper-proof. You can password protect your PDF to restrict access, or make an editable PDF non-editable to prevent unwanted changes.
Batch Add Watermark to Multiple PDFs Using Built-In Automation Tool
Automator is a native automation tool on macOS that lets you apply image watermarks to multiple PDFs in one go—ideal when working with large batches.
Here’s how to do it in just a few steps:
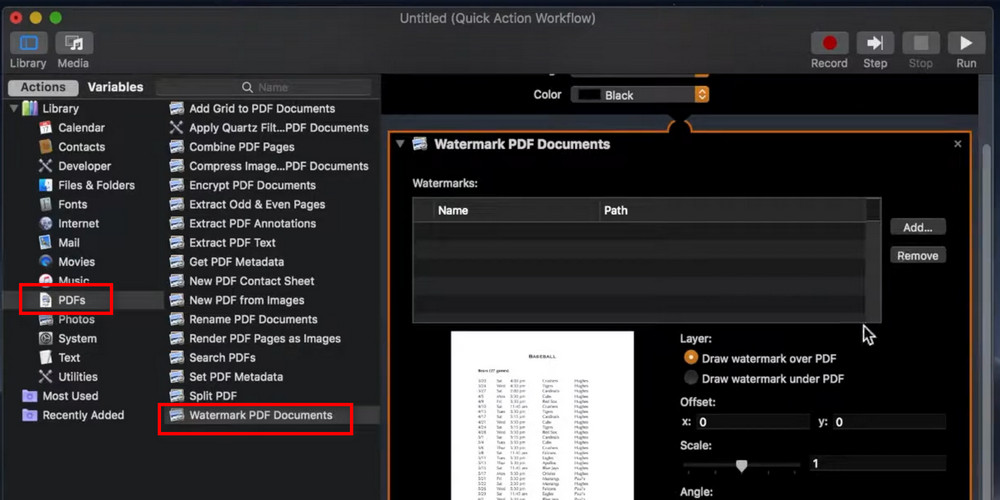
Step 1. Open Automator, and select Quick Action from the file type window. Then choose “PDFs” from the first column, select “Watermark PDF Documents” from the second column, and drag it into the workflow window.
Click “Add” and choose a pre-set image watermark, locate the watermark at an appropriate spot, and adjust its size, angle, and opacity of the watermark.
Go to Watermark PDF Documents in Automator
Step 2. Go to “Files and Folders” from the Library sidebar, select “Move Finder Items” from the second list, drag it to the right window, and choose a desired folder to store the watermarked PDFs.

Edit Watermark in Automator
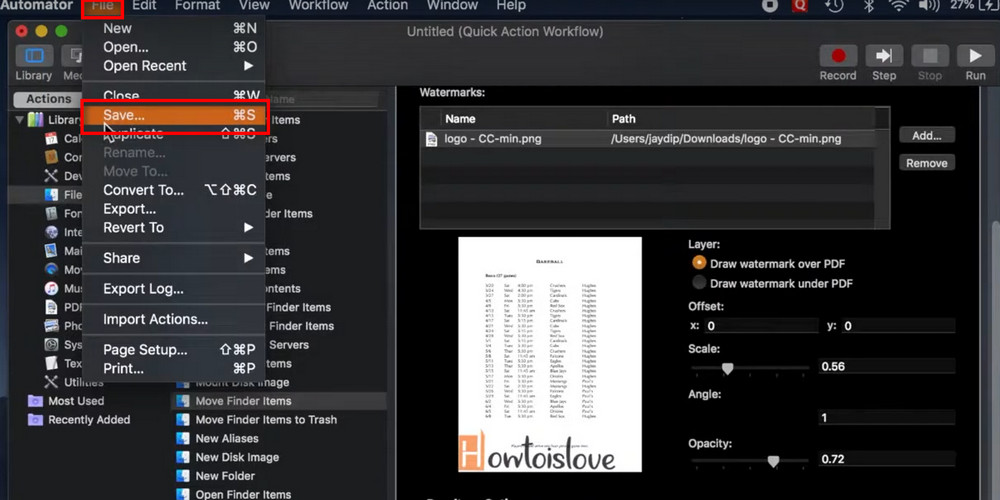
Step 3. Navigate to “File”, choose “Save” to name and save the watermark workflow.
Save the Workflow in Automator
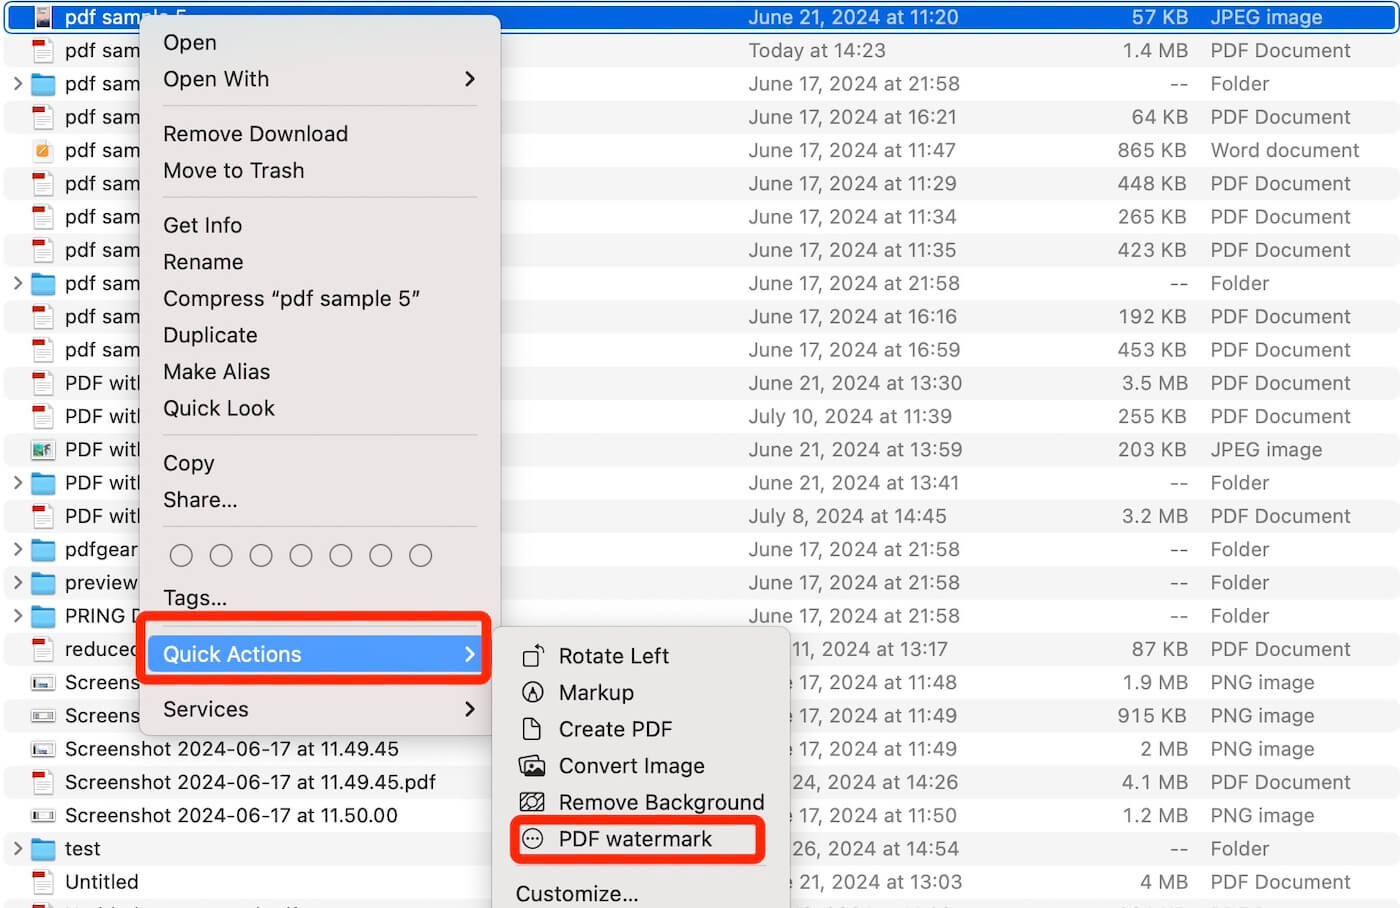
Step 4. When the PDF watermark Quick Action workflow is created, select any PDF file from your Finder, right-click on the file, select Quick Action, choose the PDF watermark workflow, and the PDF files will be automatically watermarked with the image you just set.
Apply Image Watermark to PDF on Mac
When your PDF contains many pages or you have several PDF files to watermark, Automator will be a better choice with its outstanding batch-process function. However, the process of creating the workflow may be frustrating for some users.
To improve the efficiency of watermarking PDFs, some professional PDF watermark creators might be preferred.
FAQs
How can I add an image as a watermark in Preview?
To add an image watermark, open the PDF in Preview, go to the Markup Toolbar, and click on the ‘Add Image’ button to insert an image from your computer. You can resize and reposition the image to serve as a watermark.
Is it possible to adjust the opacity of the watermark in Preview?
Preview doesn’t offer a direct way to adjust the opacity of text or image elements used as watermarks. As a workaround, you can adjust the opacity of an image watermark using an image editing tool before adding it to the PDF.
Can I save a PDF with a watermark so it can’t be removed?
When you add a watermark in Preview and save the PDF, the watermark becomes a part of the document. However, it’s not foolproof; someone with PDF editing software could potentially remove or alter the watermark.
How do I ensure my watermark appears on every page of the PDF?
You need to manually add the watermark to each page in Preview, as it doesn’t support automatically adding watermarks to multiple pages at once. For documents with many pages, a dedicated PDF editor with watermarking capabilities might be more efficient, like PDFgear.
Can I use Preview to watermark multiple PDFs at once?
Preview doesn’t support batch processing, so you can’t watermark multiple PDFs at once. You would need to open each PDF individually and add the watermark manually, or use a PDF editor that supports batch watermarking.
Conclusion
Though Mac Preview lacks native watermarking, its versatile tools enable simple workarounds. By inserting creatively formatted text boxes or image watermarks, authenticity and ownership can still be protected.
Ranging from subtle signatures to prominent organizational logos, customizable watermarks defend documents against unauthorized use.
For individual files or batch processing, Mac’s preview and automation tools sufficiently watermark and deter fraud. When confidentiality and brand integrity are priorities, enabling protective marks through Mac’s built-in apps is essential. Implementing watermarks securely adds that vital layer of defense.