4 Simple Methods to Convert JPG to PDF on Windows 10

Summary :
Learn the free ways to convert JPG to PDF on Windows 10 using online and offline converters, the built-in Photos app, and Microsoft Word.
Table of Contents
Convert JPG to PDF on Windows
Converting JPG to PDF on a Windows PC is essential as it preserves image quality and prevents corruption when sharing multiple images. It simplifies the process of sending multiple pictures as a single file and ensures compatibility across devices.
Below, we’ll introduce 4 practical and free methods to convert JPGs into one or multiple PDFs. The steps are easy to follow.
Convert JPG to PDF in Bulk for Free on Windows 10
To enhance your file privacy and efficiently batch convert JPG to PDF, PDFgear is an excellent choice. This tool streamlines JPG to PDF conversion with its user-friendly interface while preserving image quality, ensuring your PDFs maintain a professional appearance. It performs well on Windows 10 and 11, covering most Windows users.
Here’s a comprehensive step-by-step guide for batch converting JPG to PDF using PDFgear Desktop:
Step 1. Open the image to PDF Converter
Obtain PDFgear for your Windows 10 device. Once installed, double-click the software to open it. Then find the Image to PDF tab.
Step 2. Upload JPG Images
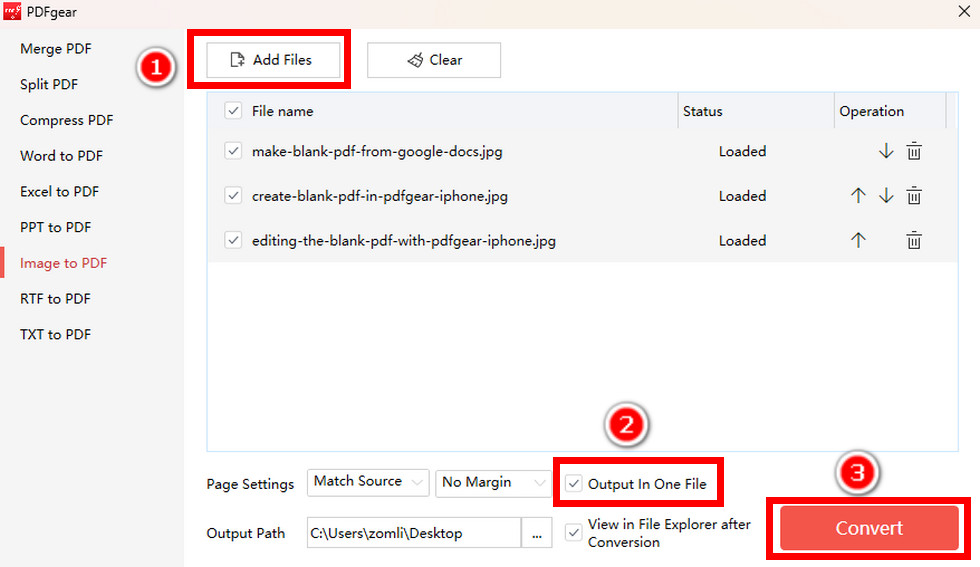
Click the “Add Files” button on the top of the tool window to upload your JPG file. To upload multiple JPGs, long-press the Ctrl button and select the images.
Step 3. Batch convert JPG to PDF
After you’ve uploaded your files, select your desired page settings and set the file output location at the bottom of the window. To combine all the images into a single PDF, make sure to check the “Output In One File” box.
Batch Convert JPG to PDF
Once you’ve made these decisions, click the red “Convert” button. The explorer of the folder where the file is located will automatically open, and you can find your newly created PDF file.
Besides, if the output document is too large, PDFgear offers an advanced PDF compression feature to save your storage and speed up file sharing.
Convert JPG to PDF on Windows 10 Online for Free
To maintain high image quality and layout during JPG to PDF conversions, we recommend using the reliable PDFgear online image converter.
No download, no signup required. All you need is a stable network. And since it’s a web-based tool, you can use it on almost any type of platform. Here is how to convert JPG to PDF online using PDFgear.
Step 1. Upload Your JPG File
Access PDFgear online JPG to PDF converter on any browser.
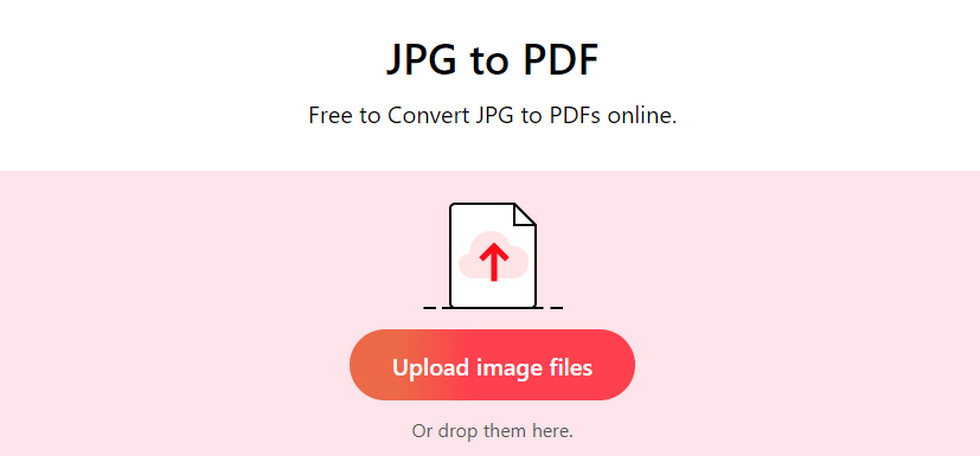
You can then drag and drop your JPG files onto the PDFgear online tool or click the “Upload image files” button to import them.
Upload JPG Image to Online Converter
Step 2. Convert JPG to PDF
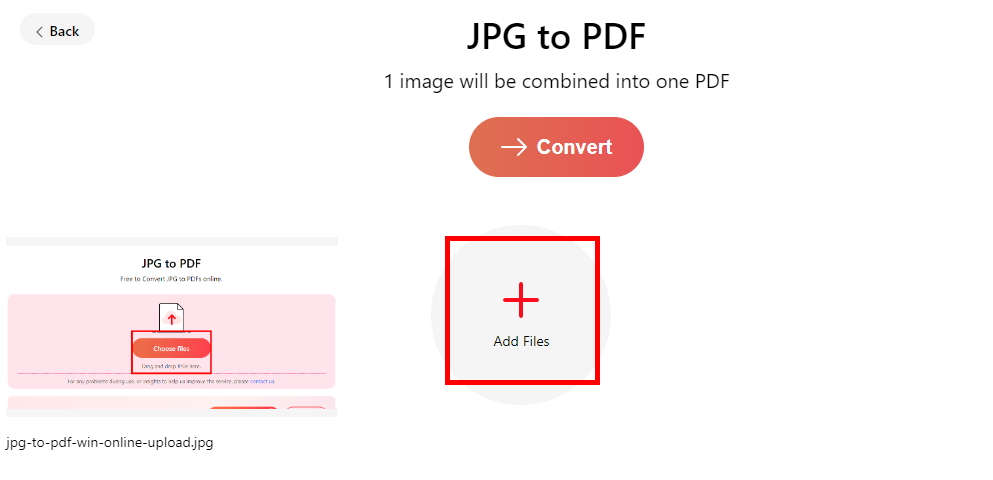
After uploading your JPG file, click the “Convert” button to start the conversion. It will take a few seconds to convert your JPG files to PDF files.
The PDFgear online JPG to PDF converter offers a batch conversion feature. You can upload multiple JPGs by holding “Ctrl” or clicking “Add Files” to upload more.
Upload Your PDFs in Batches
Step 3. Save the Converted PDF File
Once the conversion is complete, click the “Download” button to save the PDF file to your computer. The trash can icon allows you to delete the converted file.
Here is a video tutorial to help you intuitively understand how to convert JPG to PDF online on Windows 10.
Convert JPG to PDF on Windows 10 with the Native Photos Application
For those who prefer not to install third-party apps, you can use the built-in Photos program to convert JPG files to PDF on Windows.
When you open a JPG image in the Photos app, you can use the “Microsoft Print to PDF” feature on Windows to convert JPG (image) files to PDF (Portable Document Format) files. Here’s how you can use this feature to convert a JPG to a PDF:
Step 1. Open the JPG with Photos
Open the JPG image you want to convert in the built-in Photos app.
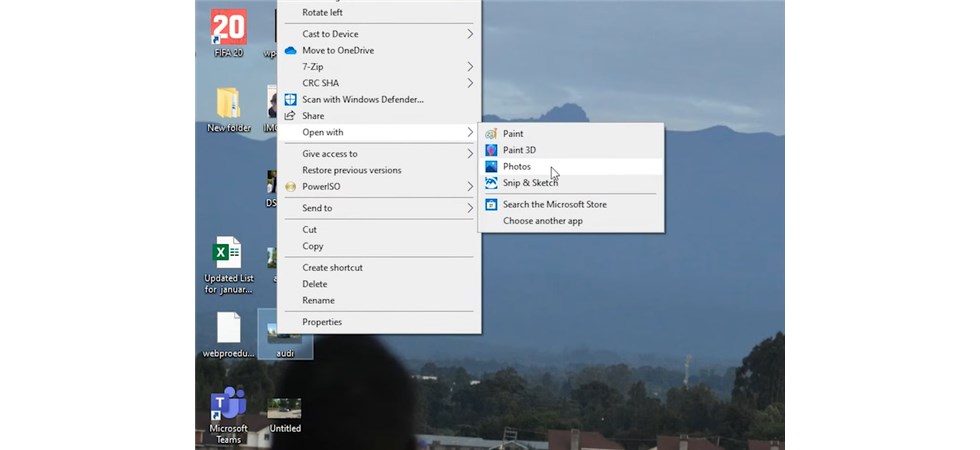
Open the JPG Image with Photos
Once the image is open, click on the “Print” option. This option is usually available in the top menu or toolbar of the image viewer.
Alternatively, press the Control + P button simultaneously on the keyboard to access the “Print” option.
Click the Printer Icon
Step 2. Select Microsoft Print to PDF
In the Print dialog that appears, you’ll need to select “Microsoft Print to PDF” as the printer. This option should be available in the list of available printers.
Configure the print settings according to your preferences, such as page size, orientation, and quality.
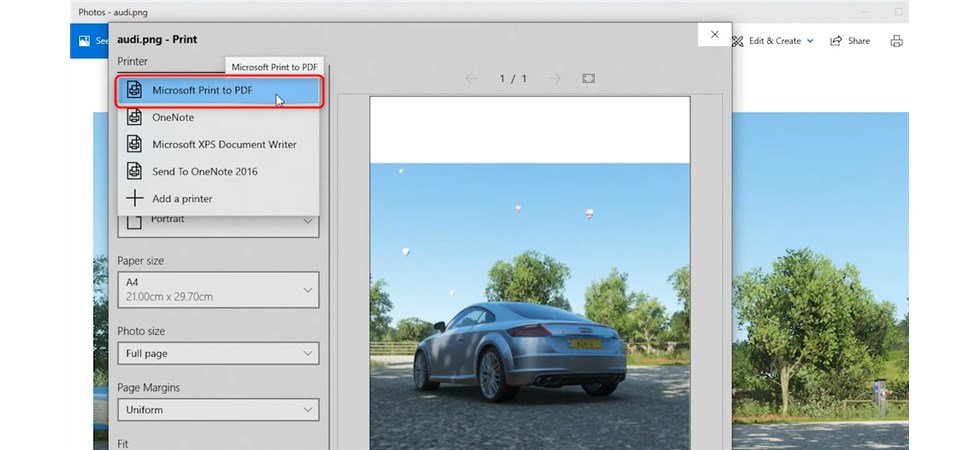
Select Microsoft Print to PDF
Step 3. Save the JPG as a PDF
Click the “Print” or “Save” button, and you will be prompted to choose a location on your computer where you want to save the PDF file. Provide a name for the PDF file as well.
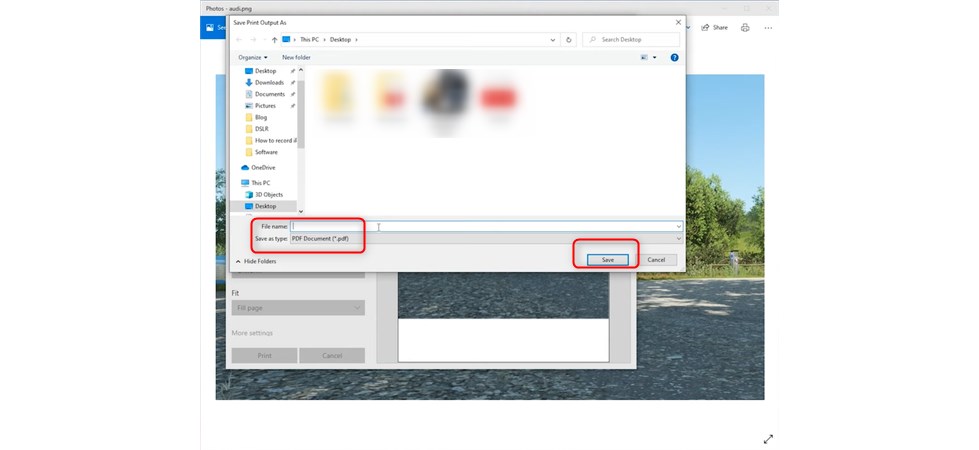
Save the PDF to the Computer
Click “Save,” and the JPG image will be converted to a PDF file with the specified settings.
Convert JPG to PDF on Windows 10 Using Microsoft Word
Microsoft Word doesn’t provide direct conversion of individual JPG files into separate PDF files, but it allows you to create a PDF document that includes JPG images.
If you need to convert multiple JPG images into individual PDFs, it’s often more efficient to use a dedicated image-to-PDF converter or online tool designed for batch conversion.
Step 1. Create a New Document in Word
Open Microsoft Word, then create a new document or open an existing one.
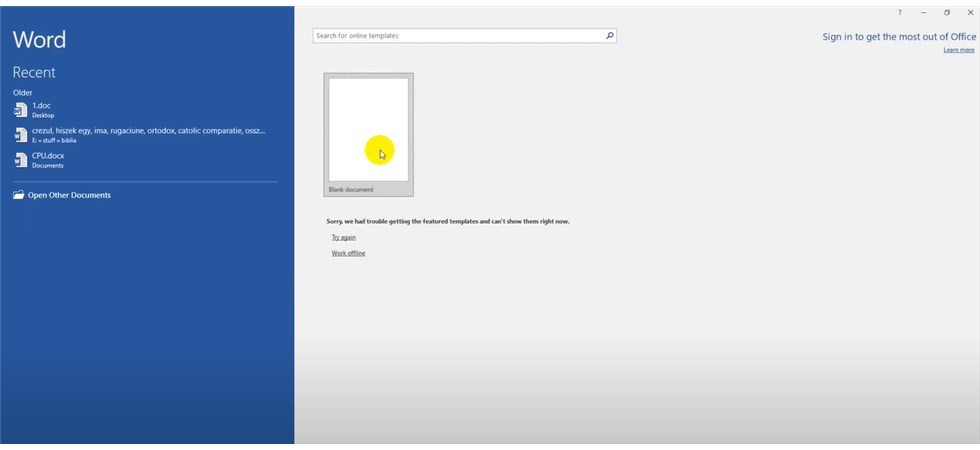
Create a Blank Document in MS Word
Step 2. Insert the JPG into a Word Document
Before inserting the image, click the Layout tab to adjust the margins and set all values to 0 in the pop-up window. To better accommodate JPG images, you can select a page size suitable for 4A.
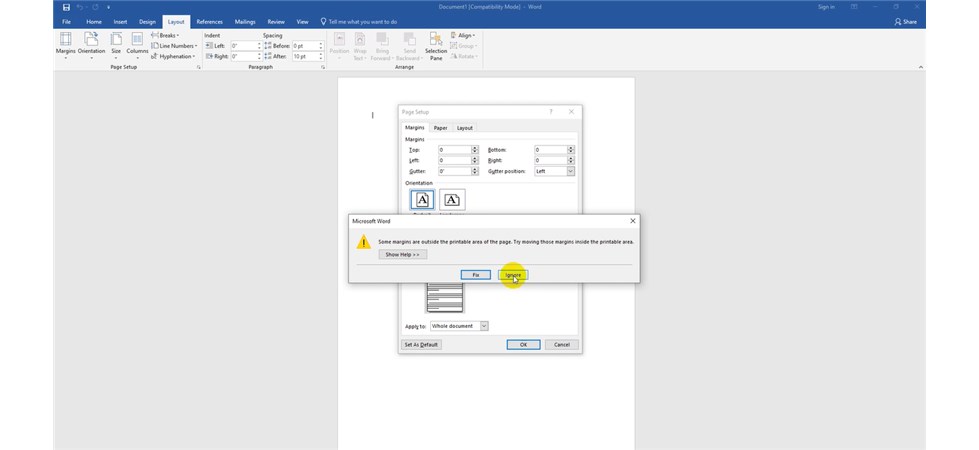
Customize Page Setup
Place your cursor where you want to insert the JPG image. Go to the “Insert” tab in the Word ribbon.
Click on “Picture” or “Image” and select the JPG file you want to insert. The JPG image will be inserted into your Word document.
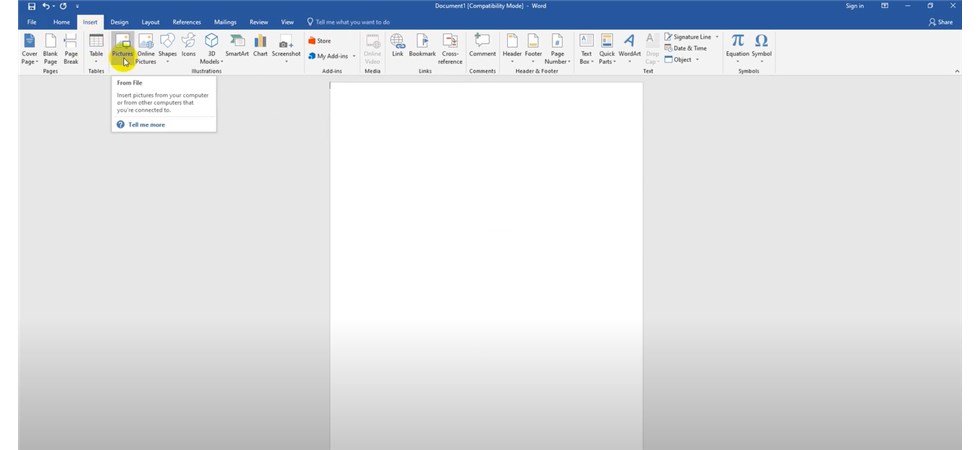
Insert the JPG Picture
Step 3. Save as PDF
After you’ve inserted the JPG image(s) into the Word document, you can save or export the entire document as a PDF. Go to the “File” menu.
Select “Save As” or “Save a Copy.” Choose the location where you want to save the PDF.
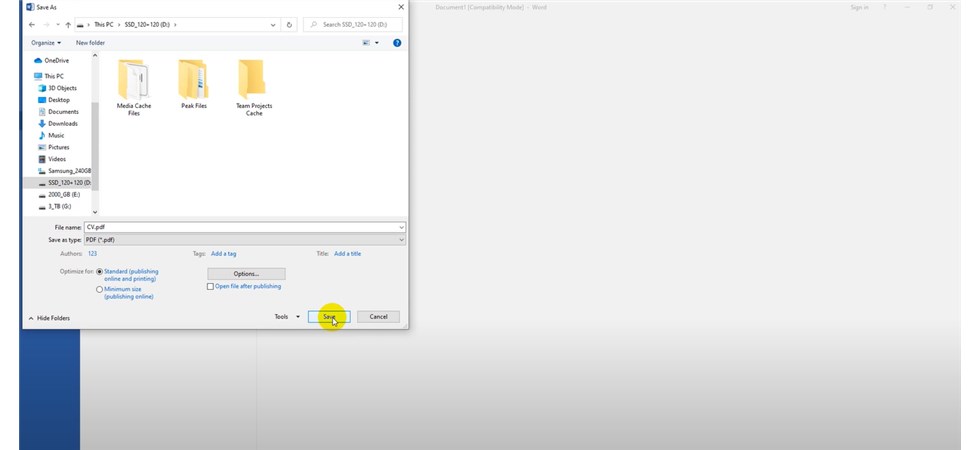
Save JPG as PDF in MS Word
In the “Save as type” dropdown menu, select “PDF.” Click the “Save” button.
Your Word document, including the inserted JPG image(s), will be saved as a PDF.
FAQs
How to enable Microsoft Print to PDF option
If you can’t locate the “Microsoft Print to PDF” option in your Photos application, follow these steps to enable it. Search for “Control Panel” in the Start menu, click on “Programs,” then find the “Turn Windows features on or off” option. Locate “Microsoft Print to PDF,” select it, and click “OK.”
How do I convert PDF to JPG for free?
If you want to convert your PDF to JPG, you can also use the PDFgear online tool. It only takes three simple steps to complete the conversion: open PDFgear online PDF to JPG converter> drag and drop to upload the PDF file > click the Save button to import the JPG file to your computer.
How to convert JPG to PDF without software?
No download, no registration. You can use PDFgear online converter to convert JPG to PDF without any restrictions. This online converter also supports Word, Excel, PPT, PNG, HEIC, and other major formats to help you deal with the task of converting from one format to another.