How to Compress PDF Offline for Free

Summary :
PDFgear helps you discover how to compress your PDFs offline quickly, safely, and with complete control over quality.
Table of Contents
Large PDF files can be a headache, they take forever to upload, exceed email limits, and clutter your storage. While many online tools promise quick fixes, they often require uploads, risk privacy, or limit file size.
If you prefer compressing PDFs offline, without an internet connection or uploading files to servers, this guide is for you. You’ll learn how to reduce PDF size using PDFgear’s free offline compressor, Adobe Acrobat, and built-in tools.
Compress a PDF Offline for Free with PDFgear
The best way to compress PDFs offline is with the PDFgear desktop app, which runs entirely on your device, no uploads, no cloud processing, and no internet needed. This ensures complete data privacy while delivering top-tier compression performance.
Rated 4.8★ on G2 and 4.9★ on Trustpilot, PDFgear is praised for its lightweight offline compression that protects privacy while maintaining quality.
PDFgear provides a fast, lightweight, and professional-grade offline PDF compressor that combines simplicity with advanced optimization. Most free apps either limit functionality or degrade quality, but PDFgear provides powerful offline compression with adjustable strength, consistent results, and zero cost.
Steps:
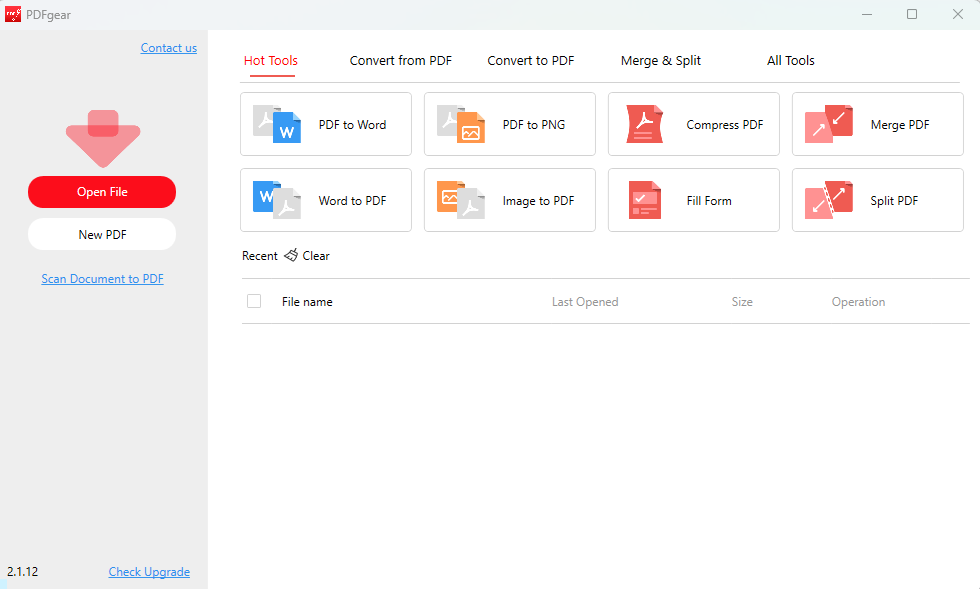
1. Download and install PDFgear for Windows or macOS. Launch the program.
2. Click Compress PDF in the Hot Tools section. Click Add Files to add your PDFs.
3. Choose your desired compression strength (Light, Standard, or Strong).
4. Click Compress to start the compression.
Compress PDF Offline
Why the PDFgear App Is the Best Offline PDF Compressor
- Free of Charge: Unlike most other professional PDF compressors like Adobe Acrobat, PDFgear is totally free to use.
- Ease of Workflow: With PDFgear, the process is fast and intuitive: open, compress, save. Built-in tools involve multiple menus, print dialogs, or unclear filters.
- Image and Text Quality: PDFgear’s offline engine preserves sharp images and clear text through intelligent re-encoding and font subsetting. Preview and Print to PDF methods often blur or rasterize graphics.
- Batch Compression with Consistency: Compress hundreds of files at once using the same settings.
- Preserves Interactivity: Links, form fields, and bookmarks remain intact.
- Multi-threaded Performance: Leverages CPU cores for faster compression, even with large files.
- Compression Ratio: PDFgear achieves 70–90% reduction while maintaining readability. macOS and Windows built-ins average under 50%, often with lower visual fidelity.
- Extensive Features: PDFgear also integrates tools like Merge PDF, Split PDF, and Convert PDF, creating a full offline PDF workspace.
- Security and Privacy: All compression happens offline on your device. No internet, no upload, no risk. That makes PDFgear the ideal offline compressor for confidential or professional use.
With PDFgear, you get the control and privacy of offline compression without sacrificing speed or clarity, something most built-in or online tools can’t match.
Compress PDF Offline with Adobe Acrobat
Compressing a PDF in Adobe Acrobat is a professional and reliable way to reduce file size while maintaining document quality. Adobe Acrobat’s built-in optimization engine intelligently analyzes images, fonts, and embedded elements to minimize size without visibly degrading quality. It also provides advanced settings to customize compression levels, making it suitable for users who require precise control over their PDF output, such as business professionals or publishers.
Steps to compress a PDF in Adobe Acrobat:
1. Open your PDF in Adobe Acrobat Pro.
2. Go to the File menu and select Save as Other → Reduced Size PDF, or choose File → Optimize PDF for more detailed options.
3. In the Optimize PDF panel, adjust parameters like Image Quality, Downsampling, and Font Optimization.
4. Use the Audit space usage tool to identify which elements consume the most space.
5. Click OK or Save to export your compressed PDF.

Compress PDF in Acrobat
Although Adobe Acrobat provides robust compression capabilities, it requires a paid subscription to access the full suite of optimization tools. The interface can also feel complex for casual users who just need a quick compression task.
For those looking for a free and easier alternative, PDFgear is a great choice. PDFgear allows you to compress PDFs offline for free without a subscription, while maintaining excellent output quality, making it an ideal solution for everyday users.
Compress PDF with “Print to PDF”
Almost every modern operating system includes a “Print to PDF” feature that re-creates your document as a new, sometimes smaller PDF. It’s simple and free, but its compression effect varies.
This process re-renders the document, sometimes trimming metadata or flattening layers to slightly reduce size. However, it doesn’t truly compress images or fonts. As a result, the reduction is small, often under 10%.
The steps on different operating systems follow the same principle, and we’ll use the steps on Windows as an example.
Steps:
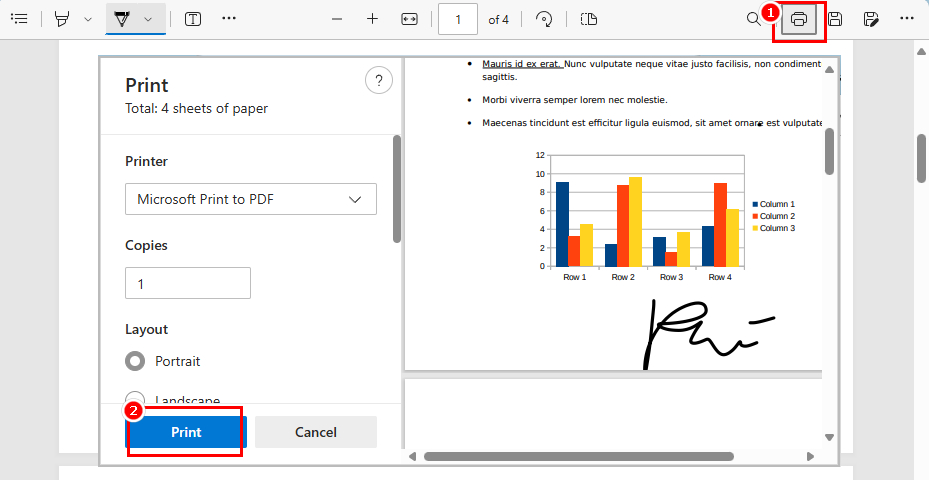
1. Open your PDF in Microsoft Edge (Preview on Mac, Photos on iPhone, etc.).
2. Press Ctrl + P to open the print dialog.
3. Choose Microsoft Print to PDF as the printer.
4. Click Print, then choose a save location.
Print to PDF
Test Results (Cross-OS Comparison)
To see how effective this method really is, we tested the same 302KB mixed-content PDF on several operating systems. The file included text, vector graphics, and a few images to represent a realistic workload.
| Operating System | Method | Output Size | Percentage Change | Quality |
| Windows 11 | Microsoft Print to PDF | 239.0KB | -20.9% | Minor quality loss |
| macOS | Save as PDF via Print Dialog | 287.2KB | -4.9% | No visual loss |
| Android | Save as PDF via Print Dialog | 311.1KB | +3.0% | No visual loss |
| iOS | Print > Pinch > Save to Files | 277.2KB | -8.2% | No visual loss |
Analysis
-
Quality: The Print-to-PDF feature preserves text perfectly but does not meaningfully compress images.
-
Performance: File-size reductions are modest — typically under 20 %. That’s because this method re-renders the document instead of optimizing its content. On Android, the resulting file was actually larger than the original.
-
Cross-platform consistency: Output quality is consistent across systems — good text fidelity with minimal compression.
Overall, Print to PDF is best suited for quick re-saving or flattening forms before sending a file via email. For substantial compression and professional-quality results, a dedicated tool like PDFgear performs far better.
Compress PDF with Mac Preview
Every Mac includes Preview, Apple’s built-in PDF viewer that can also perform basic compression offline. It’s convenient for light tasks but offers little control over compression quality.
It works by exporting your PDF with a Quartz Filter, a built-in macOS feature that automatically reduces image resolution and optimizes data within the file.
1. Locate your PDF file in Finder, right-click, and choose Open With → Preview.
2. In Preview’s menu bar, click File → Export… (not Export as PDF).
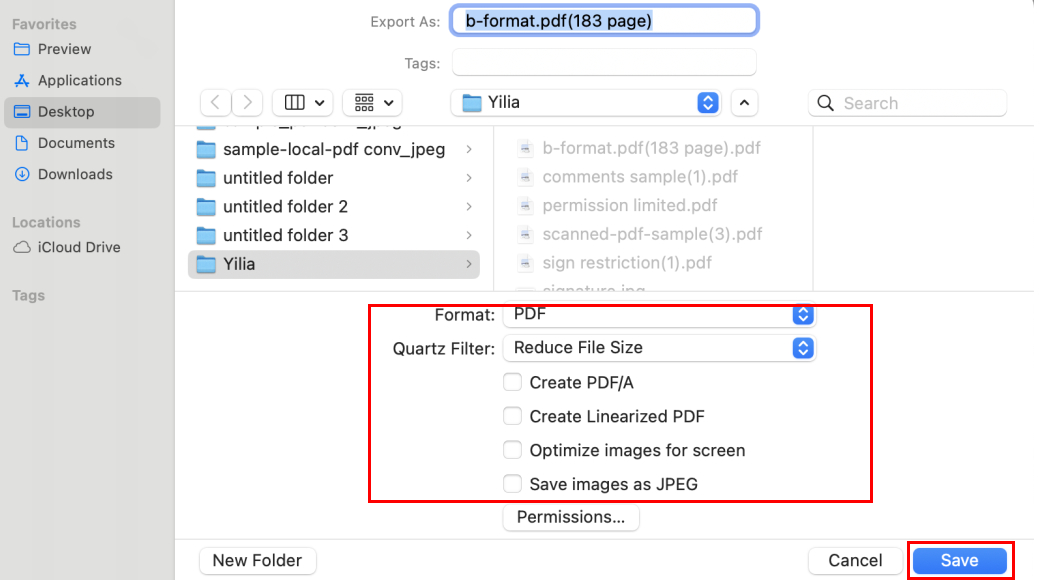
3. In the dialog that appears:
- Format: Choose PDF.
- Quartz Filter: Select Reduce File Size from the dropdown.
4. Then choose a save location and click Save.
5. If needed, find the new compressed file in Finder. Right-click → Get Info to compare its size with the original.
Reduce PDF Size with Preview
However, note that the built-in “Reduce File Size” filter applies aggressive compression, often lowering image quality significantly. It’s best for simple PDFs with text and few images. If your file includes many detailed graphics, Preview’s default filter may overcompress.
For better quality control, you can create a custom Quartz Filter using the ColorSync Utility (found in Applications → Utilities → ColorSync Utility → Filters). There, you can duplicate “Reduce File Size” and adjust image resolution or compression levels manually.
Do Desktop PDF Compressors Really Work Offline?
We tested several desktop PDF compressors in offline mode using files of different sizes and observed notable differences in performance.
Some applications, such as the Smallpdf desktop app, claimed to complete compression instantly when the device was disconnected from the internet. However, the output files were the same size as the originals, which shows that no real compression happened. This suggests some “offline” compressors still depend on cloud servers.
In contrast, apps like PDFgear and iLovePDF worked completely offline and made the files much smaller.
Our tests show that not every “offline” PDF compressor works locally, but the PDFgear desktop app does. It compresses files locally on your device and keeps your documents private and secure.
Expert Tips for Best Offline PDF Compression Results
To get the smallest file size without losing clarity, it helps to follow a few proven offline compression practices. These include choosing the right compression level, optimizing images before creating PDFs, decluttering files, and avoiding repeated compression. PDFgear also allows batch compression, splitting large PDFs, and removing unnecessary metadata for extra savings.
For a complete walkthrough of these techniques — including how to fine-tune DPI, manage image quality, and keep your files crisp yet compact — check out our full guide: How to Further Compress a PDF
FAQs
How to compress a PDF file size without the internet?
You can use our PDFgear desktop app, which works completely offline. With it, you can compress, merge, or edit PDFs without connecting to the internet.
Is PDFgear’s offline compressor free?
Absolutely. PDFgear desktop app offers full offline compression at no cost — no watermark, no sign-up, and no restrictions.
How to compress a PDF offline without losing quality?
To compress PDF offline without quality loss, you should use PDFgear. PDFgear’s offline engine ensures crisp images and clear text by utilizing advanced re-encoding techniques and font subsetting.
How to compress a PDF to 100KB, 200KB, or 500KB offline?
PDFgear allows you to fully customize the compression level (from light to strong) based on the size of the original document. It also lets you fast check the output file size to ensure it meets your desired result.
How to compress a PDF in a laptop offline?
You can use the PDFgear desktop app to compress PDFs fully offline on any modern PC or laptop.
How do I reduce the size of a PDF manually?
In PDFgear, you can remove unnecessary pages, print in black and white, or split large PDFs to manually reduce the file size. For more details, see our other guide: How to Further Compress a PDF.
Is my data safe when compressing PDFs offline?
Yes — files never leave your computer. Everything happens locally in PDFgear desktop app.
Can I compress multiple PDFs offline at once?
Yes. PDFgear desktop app’s batch compression feature lets you process many PDFs simultaneously with consistent results.
Why did my PDF become blurry after using Preview or Print to PDF?
Built-in tools use fixed filters that overly reduce resolution. PDFgear lets you control compression level, preserving text and image clarity offline.
Why is my file larger after using Print to PDF?
“Print to PDF” re-renders the file instead of optimizing it, sometimes increasing size. Use PDFgear for true offline compression.
Conclusion: Compress PDFs Offline the Smart Way
If you need to compress PDFs offline, without uploading or risking privacy, PDFgear desktop app gives you full control and professional results — completely free.
Unlike built-in tools that sacrifice image clarity or limited online options, PDFgear ensures your files stay secure, efficient, and easy to manage.
PDFgear lets you:
- Compress offline — fast, secure, and private.
- Choose compression strength for your needs.
- Handle large or multiple PDFs effortlessly.
- Keep everything local, with no internet required.