How to Make PDF on iPhone Notes from Documents or Photos

Summary :
Are you on an iPhone and looking to make PDFs on the iPhone Notes app? The steps are pretty simple and easy to help you create PDFs from Apple Notes.
Table of Contents
The inbuilt Notes app on iPhone provides a handy solution for creating PDFs from paper documents. On this page, you’ll learn from our step-wise guide on how to do so.
PDFgear is the top-notch option for you to convert or create PDFs on Windows and Mac computers. It’s free, safe, full-featured, and easy to use.
Moreover, if you’re looking for a free but more professional scanning app, make sure to get PDFgear Scan.
How to Make a PDF in Notes With iPhone Camera
Apart from being one of the best free scanner apps, the Notes app on your iPhone is an excellent choice for converting your printed documents into a PDF file and save them online or offline. Since the app comes built-in, you do not need to download any third-party app on your device.
Step 1: Create a new Note on the Notes app
Open the Notes app and create a new Note. You should find the icon with the edit feature.
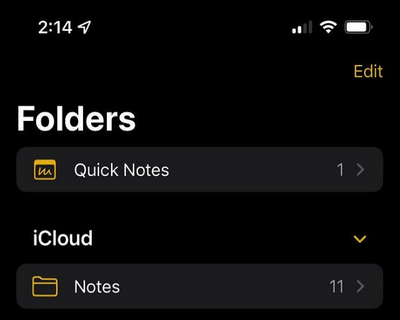
Hit Edit in the Notes App
Step 2: Launch the camera to scan the document
Tap on the Camera icon to scan the document. Tap on Scan Documents from among the options. Scan the document that you want to save as PDF.
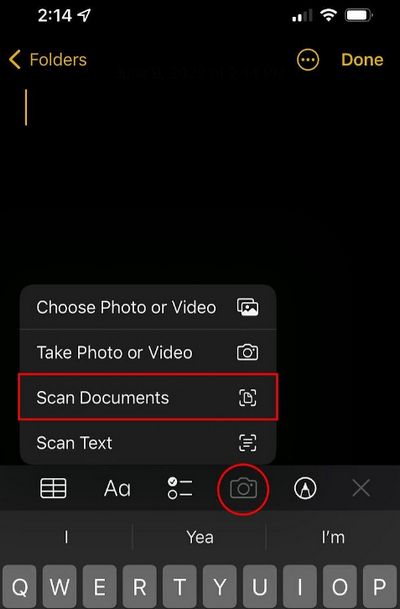
Hit Scan Documents in Notes
Step 3: Begin scanning the document
When you tap on the Scan Document option, it will launch the camera interface. Adjust the camera over the document. The app will capture the document automatically. The document will then be added to the saved documents list.
You can even opt for the Manual scanning option. This will need you to tap on the Auto to Manual. In this mode, you will tap on the camera icon to scan the document.

Scan Documents in Notes App
Step 4: Save the scanned document
If you are satisfied with the scanned document, save it by tapping on the Save icon. You can even scan multiple pages one by one.

Save the Scanned Documents in Notes
Step 5: Save the document as PDF
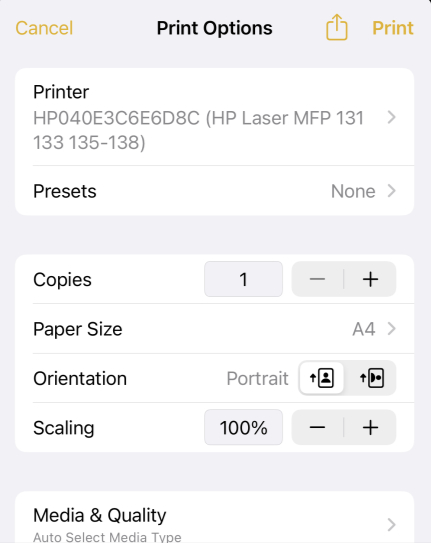
On the Note app, open the PDF, and tap on the triple dot icon at the top right corner. Choose Send a Copy from the pop menu. Now click on the Mail or Print icon. The file will be saved as a PDF.
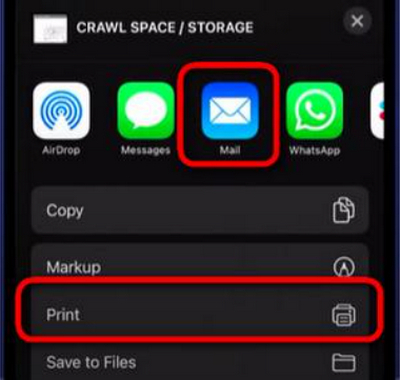
Print Scanned Document as PDF in Notes
How to Convert Pictures to PDF on iPhone Notes
Every iPhone or iOS device comes with the Notes app. The app also lets you convert your photos into PDF. From within the Photos app, you can share your images as PDF. It can be your best bet for inserting photos inside a document and saving it as a PDF.
Step 1: Create a new Note on the Notes app
Open the Notes app and create a new Note. You should find the icon with the edit feature.
Step 2: Choose Photo or video that you want to convert
Tap on the Camera icon just above the keyboard. Pick the option of Photo or video.
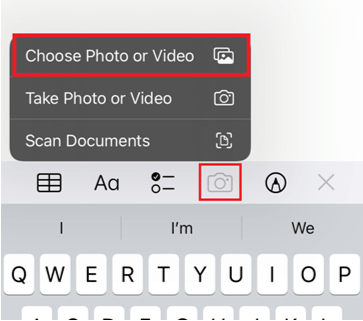
Hit Choose Photo or Video
Step 3: Choose your photo and add the album
You can choose as many photos as you would want to. Once you are done, choose Add Album. The photos will be added to the Notes page. Rearrange the photos in the order you want them in.
Step 4: Print the Photos
Tap on the share icon at the top right corner and then choose Print.
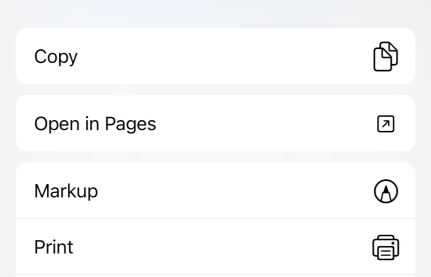
Print the Note
Step 5. Share as PDF
Tap on the share icon again in the print menu. Click the Mail icon to share the PDF through mail and the photos will be sent as a PDF file.
Share Notes as PDF
How to Save iPhone Notes as PDF Using Markup
The markup feature is yet another easier option to save the document as PDF. The method, once again, uses the Notes app on your iPhone.
Step 1: Create a new Note on the Notes app
Open the Notes app
Step 2: Open the note you want to create into PDF
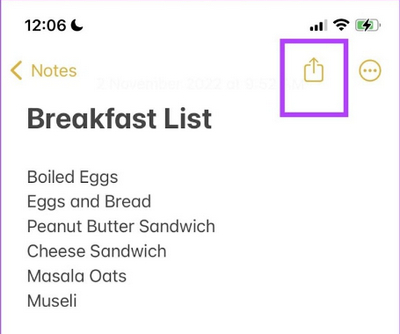
Simply tap on the note that you want to open as PDF. You can make any edits to the document if you want to. Once it is open, tap on the Share icon from the top right corner.
Hit Share Button on Notes
Step 3: Choose Markup as the sharing option
Scroll through the sharing options and tap on the Markup option.
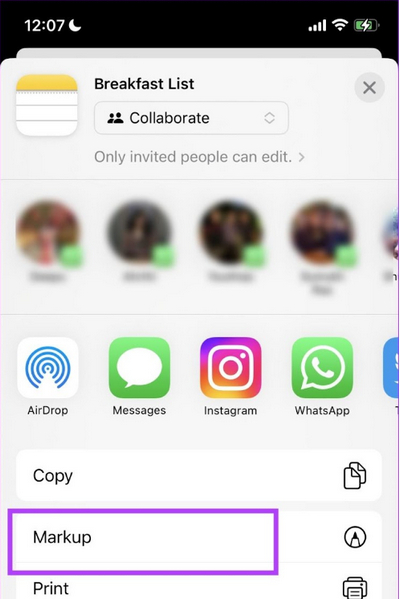
Markup iPhone Notes in Share
Step 4: Save the file as PDF
Add any annotation to the note. When you are ready to save the file, tap on Done. Next, select the option Save File to. When prompted, choose the location that you want to save the file to. That would do it, and the file will be saved as a PDF file.
Make PDFs on iPhone Using a FREE Scanner App
If you need OCR-powered scanning, editing options for your scanned PDFs, or want to share in different file formats, then a dedicated PDF scanner app is a choice.
PDFgear Scan is a free and versatile scanning app that automatically captures multiple documents, removes backgrounds, and corrects tilts.
| Features | PDFgear Scan | Notes |
| Output Formats | PDF, Word, TXT, or images | PDF with raw text |
| Editing | Crop, rotate, apply filters, insert signatures | Basic editing |
| Scans Management | In list view | Searchable via Spotlight |
| Sharing | Airdrop, Email, apps | Email or messaging |
| Multipage Scanning | ✅ | ❌ |
| Automatic Deskew | ✅ | ❌ |
| Background Removal | ✅ | ❌ |
FAQs
Can I edit the PDF after I create it in iPhone Notes app?
No, the iPhone Notes app does not allow you to edit the PDF once you create it. You will need to use a PDF editing software or app to make any changes to the file.
How can I share the PDF I created in iPhone Notes app with others?
You can share the PDF you created in the iPhone Notes app by tapping the Share button and selecting the method of sharing you prefer, such as email, text message, or AirDrop.
How can I organize the PDF files I create in the iPhone Notes app?
The PDF files you create in the iPhone Notes app will appear as regular notes in the app. You can organize them by creating folders or tags and moving the notes to those folders or tagging them.
Can I merge multiple notes into one PDF file in iPhone Notes app?
No, the iPhone Notes app does not have a built-in feature to merge multiple notes into one PDF file. However, you can use a third-party PDF editing app like PDFgear app to merge multiple PDF files into one.
Can I change PDF from portrait to landscape in iPhone Notes app?
Yes, when creating the PDF from a note in the iPhone Notes app, you can change the orientation of the output file from portrait to landscape by tapping on the “Orientation” button at the bottom left corner of the screen.
The Concluding Thoughts
Well, those were the three easy and simple options to help you create a PDF from the Notes app on iPhone. The simple and easy-to-use functionality available on the Notes app to help you convert a Note into a PDF should prove to be quite effective.