4 Free Methods to Print a Selected Portion of a PDF Page

Summary :
Learn how to print a specific zoomed-in portion of any PDF page using 4 free and easy methods. An automation method is also provided.
Table of Contents

How to Print a Selected Portion of a PDF Page
Printing out only a small portion of a PDF page will come in handy especially when you need to extract certain valuable data or pages from a lengthy or large PDF document.
Today we’ll talk about the 4 best methods to print a portion of PDF, with predefined areas and zoom levels, and without losing visual quality.
In this guide, we’ll focus on directly printing portions of PDFs, without involving advanced processes such as batch cropping for multiple PDF pages.
Methods to Print a Portion of a PDF
| Methods | Summary |
| Using Screenshot Tool in PDFgear | Open the PDF in PDFgear, use the built-in screenshot tool to take a screenshot, and save it. Read More. |
| Using Printer Tool in PDFgear | Open the PDF in PDFgear, go to Printer options, change a zoom percentage, choose page range, and print in batch. Read More. |
| Using Adobe Acrobat | Open the PDF in Acrobat, use the snapshot tool to take a snapshot, and print the snapshot into a .pdf file. Read More. |
| Automate Printing Specific Sections on Mac | Add Get Specified Finder Items into Automator workflows, set “Open with” as Preview, and save the application to where you want. Read More. |
Quickly Take a Selected Snapshot of a PDF Page for Free
The simplest way of printing a selected portion of a PDF file is using a screenshot tool, and I highly recommend using PDFgear, which is a free PDF editor as well as a PDF printer, with a variety of useful features.
PDFgear on Windows and Mac offers a 1-click Screenshot tool to take snapshots of any part of a PDF page in original quality and save it as an image file on your computer.
The snapshot portion of the PDF page will be in an image format which is natively flattened, so it will also work as a print copy.
Compared with computer’s system snapshot tools like Snipping Tool, the benefits of using PDFgear are that you are allowed to instantly edit the screenshot, copy the screenshot to the keyboard to be pasted into another document, or directly save the screenshot as a PNG file.
Step 1. Download and install PDFgear from the official website. Again, it’s free!
Step 2. Click the Open File button to import the PDF you need to work with.
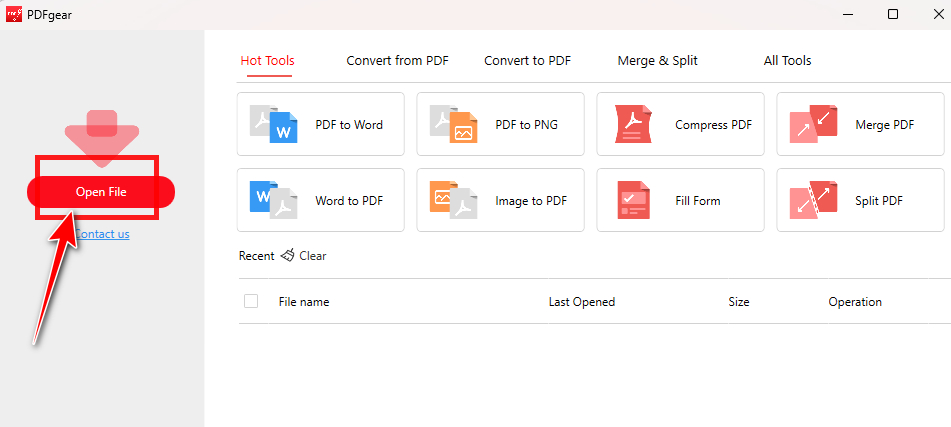
Open PDF File with PDFgear
Step 3. Go to the Home section and click Screenshot from the upper toolbar.
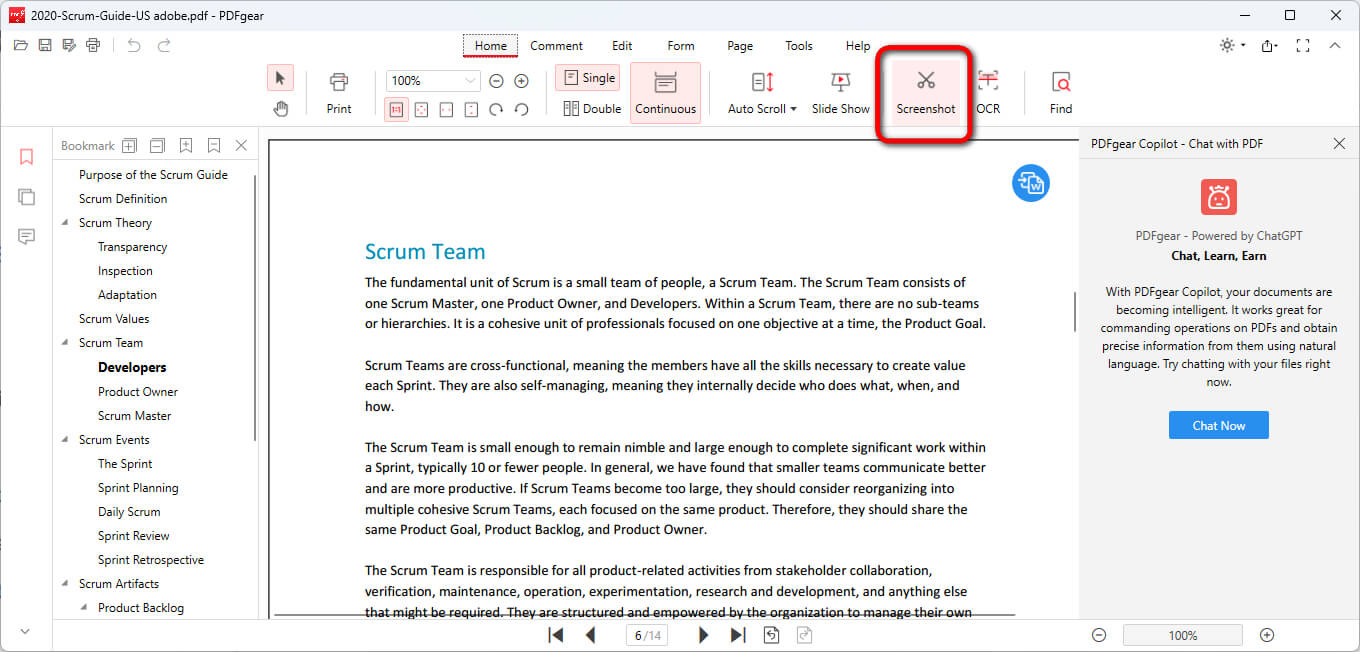
Access the Screenshot Tool
Step 4. Click, hold, and drag the cursor to draw the rectangular area of your desired portion.
Step 5. Release the cursor, and click the corresponding pop-up buttons below to edit the screenshot, copy it to the clipboard, or save it on your device.
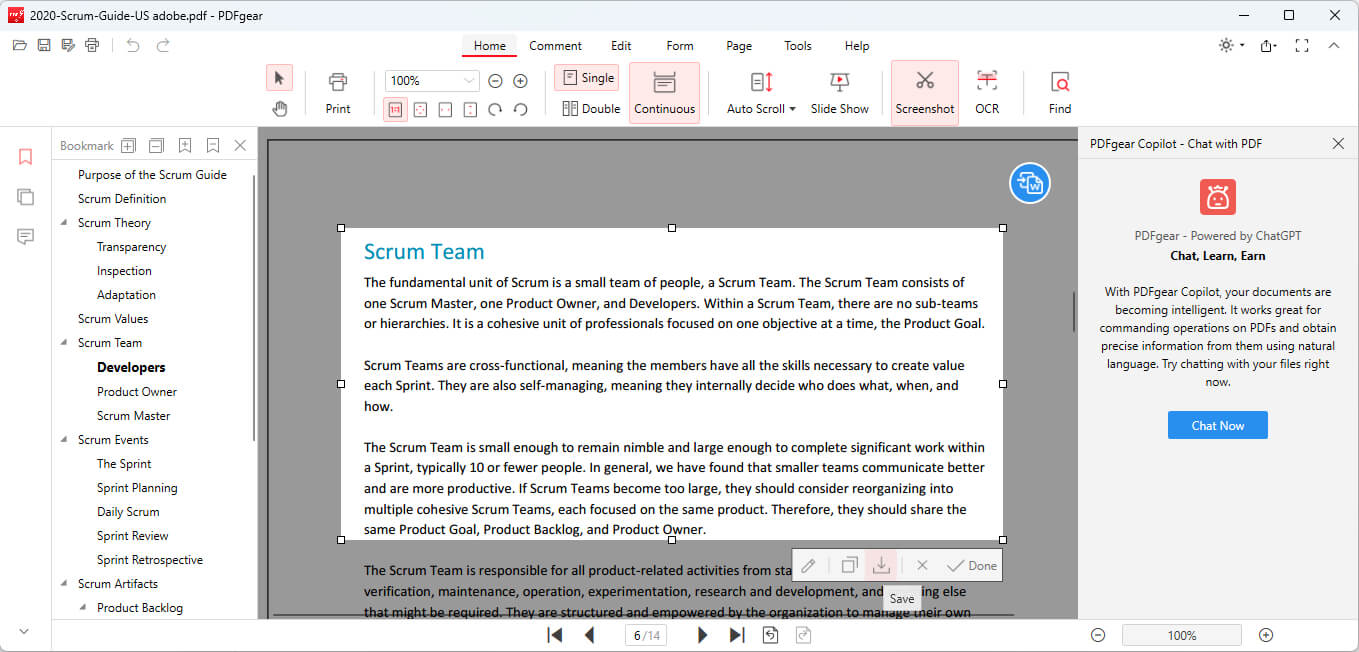
Take Screenshot and Save
However, please note that this method will reserve the size of the selected area, so if you also need to zoom in on the portion of your desired PDF page, check the following content.
Print a Zoomed Portion of a PDF Page for Free
Apart from the handy screenshot tool, PDFgear also offers a powerful PDF printer that helps easily change page sizes of PDFs or print PDFs to standard paper sizes.
PDFgear’s PDF printer has a helpful feature that allows you to print only the current viewing page to exclude other unwanted PDF pages.
However, note that the shortcoming of this method is that PDFgear currently doesn’t allow you to define the printed area, which means you’ll only get the zoomed center of your PDF page, but if that’s exactly what you’re looking for, this method is totally for you.
Step 1. Likewise, download and install PDFgear from the official website.
Step 2. Again, click the Open File button to import the PDF you need to print a portion of.
Step 3. Click the upper-left Print button or use the keyboard shortcut Ctrl + P (Windows) or Command + P (Mac) to go to the Printer menu.
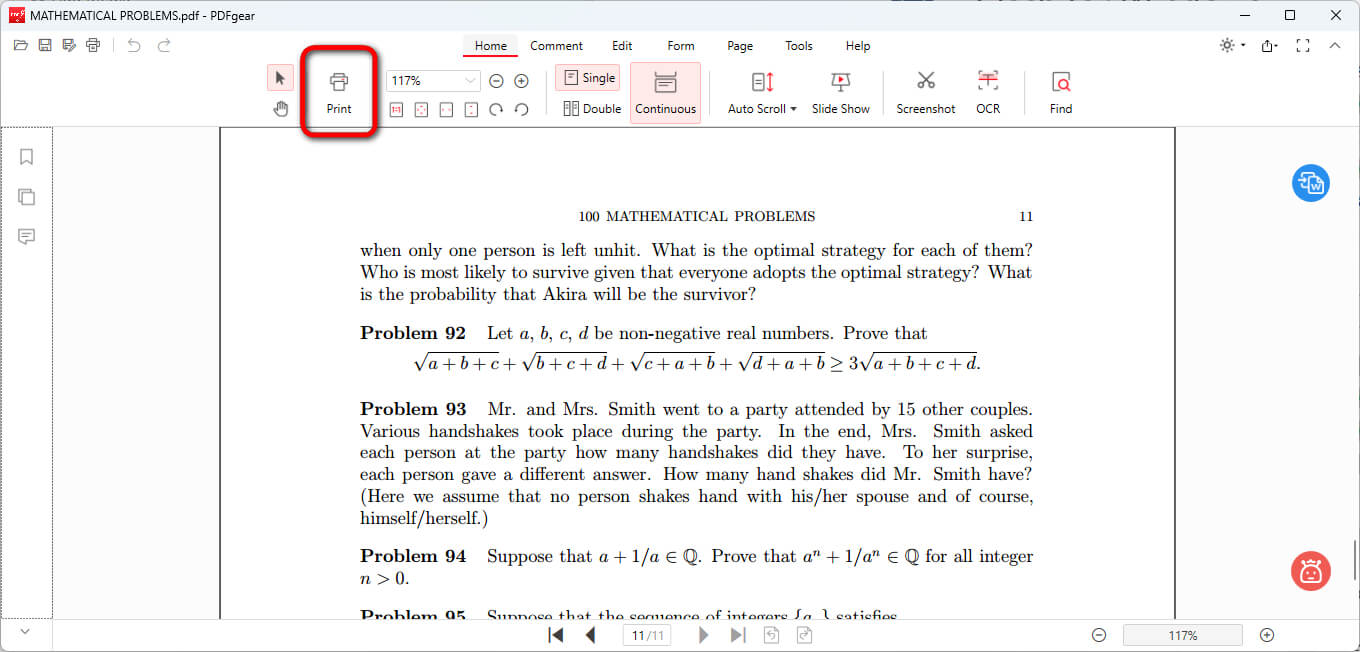
Click Print in PDFgear
Step 4. Go to the Print sizing section, click on Zoom, and set a preferred zoom ratio.
Step 5. Define the page range you need to print out, customize other settings as needed, and click Print to start printing the page portion.
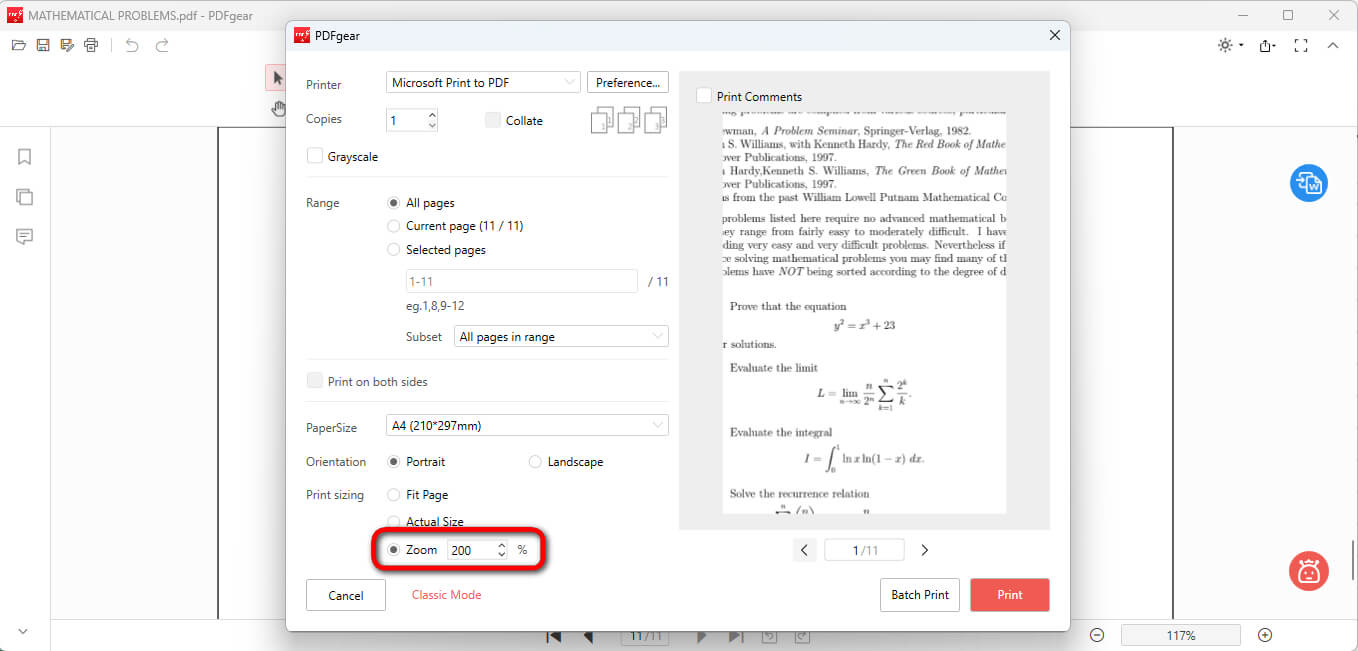
Print a Zoomed Portion
The zoom effect will apply to all PDF pages in the selected page range while printing.
Print a Snapshot of a PDF with Adobe Acrobat
Adobe Acrobat Reader, the free version of Adobe Acrobat Pro, already comes with a powerful PDF printer that allows you to take a snapshot of a selected part of any PDF page and print with a customizable zoom level.
Compared with other free PDF editors like PDFgear, Adobe Acrobat sports the edge to print screenshots into desired formats, while PDFgear only supports saving the screenshots as PNG, and you need to use the provided converter tools to manually transform them into desired formats.
On the other side of the spectrum, the steps to print portions of PDF pages in Adobe Acrobat indeed are more complicated and can be daunting for beginners, which is the reason that we introduce PDFgear first.
Step 1. Prior to starting, get Adobe Acrobat Reader from the official website. Open the PDF with Adobe Acrobat Reader.
Step 2. Go to Menu > Undo, Redo & more > Take a snapshot.
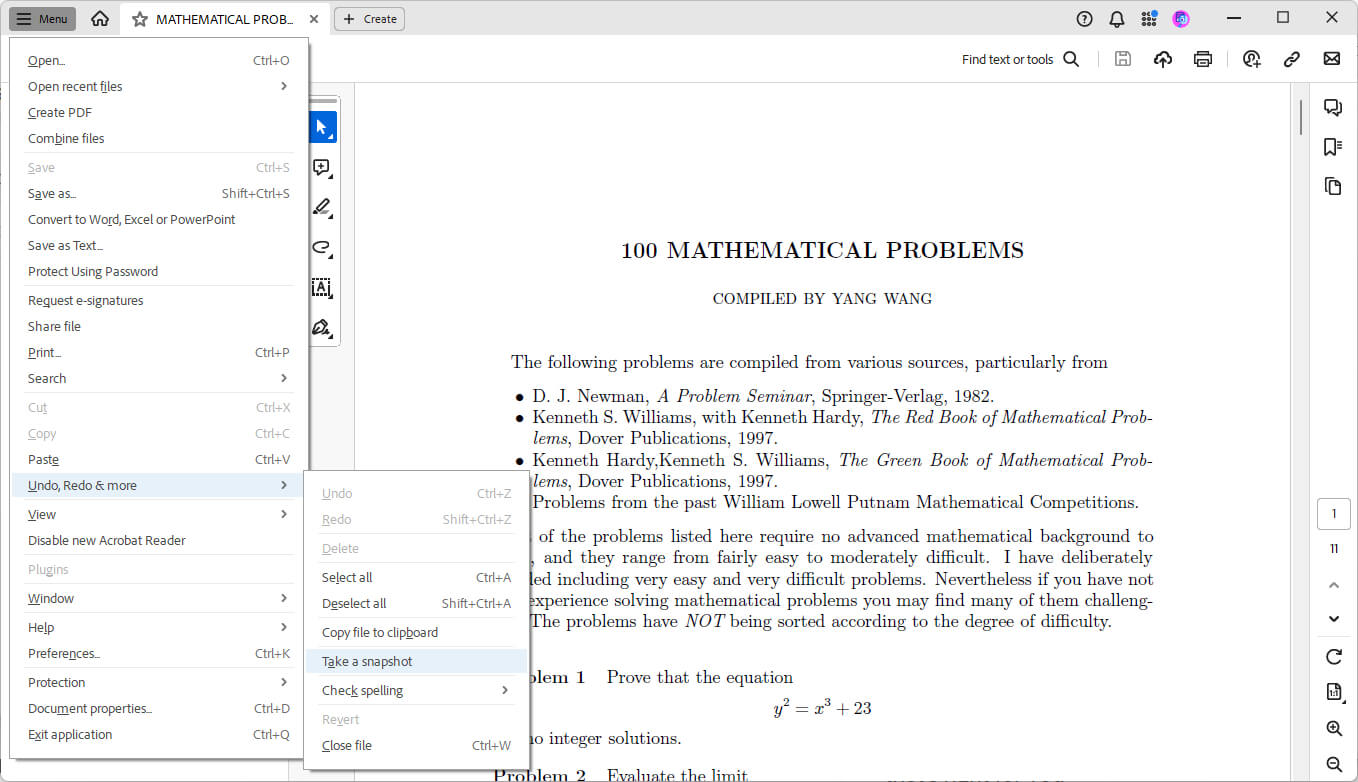
Go to Take a Snapshot
Step 3. Click, hold, and drag to take a snapshot of the needed PDF portion, and a message will pop up saying “The selected area has been copied”.

Snapshot Copied
Step 4. Click the upper-right Printer button. In the Pages to print section, tick on the Selected graphic in More Options.
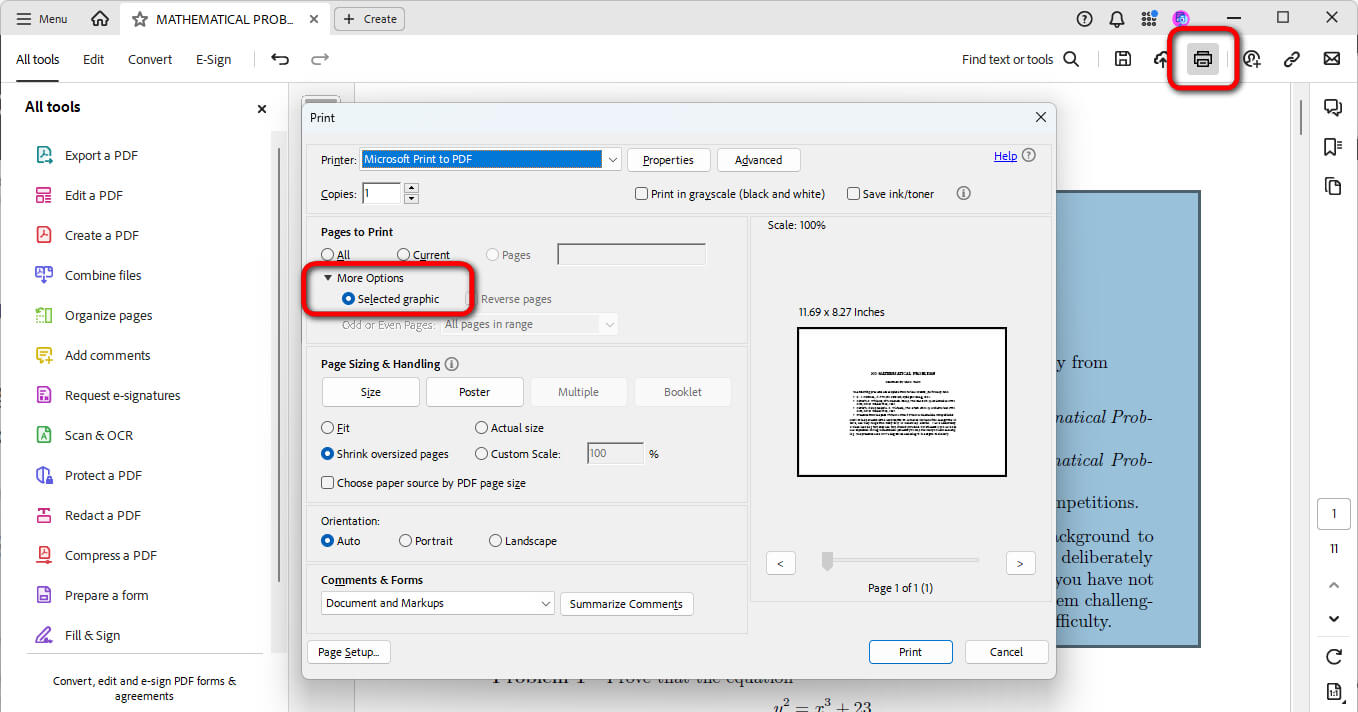
Check Selected Graphic
Step 5. Lastly, click Print to print the snapshot into a .pdf file.
Automate Printing Specific Portions of a PDF
This automation is quite tricky, but I did find one way.
On macOS, you can use Automator to create a script that selects and prints a portion of a PDF.
For example, you can use ImageMagick with a shell script in Automator to automate the process.
While Automator doesn’t have built-in actions for manipulating PDF content at such a granular level, you can create an Automator workflow that opens the PDF in Preview, where you would manually select and print the portion.
Step 1. Open Automator and select “Application”.
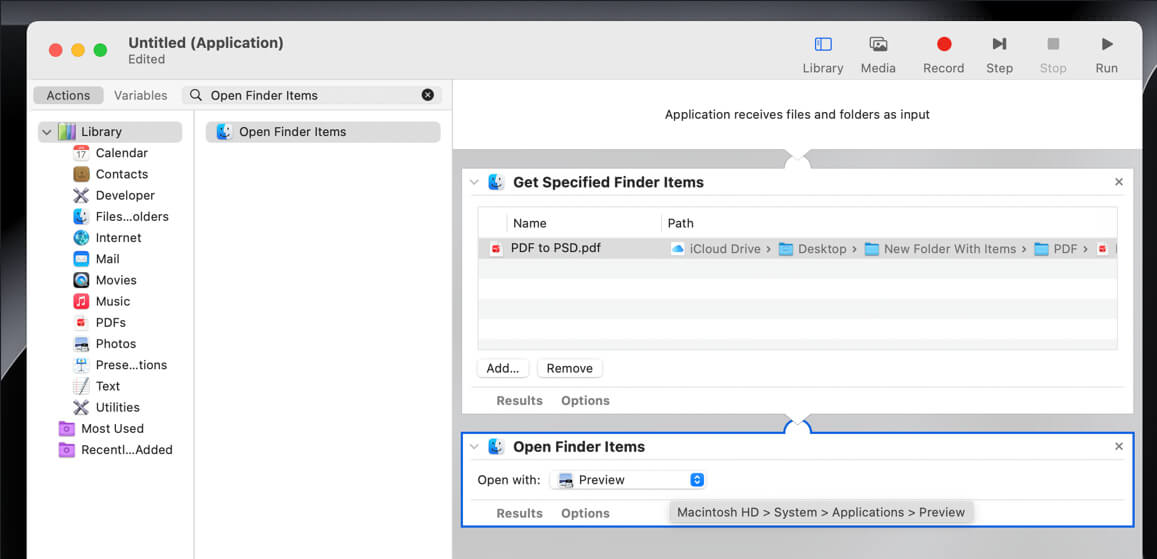
Step 2. Search for “Get Specified Finder Items” and drag it into the workflow.
Step 3. Add your PDF files to this action.
Add PDF to Actions in Automator
Step 4. Search for “Open Finder Items” and drag it below the first action.
Step 5. Set the “Open with” dropdown to Preview.
Step 6. Save the application to your desired location.
When you run this Automator application, it will open the specified PDFs in Preview, but you will still need to manually select the portion of the PDF and choose to print that selection.
FAQs
Is it possible to print multiple selected areas from a PDF at once?
Most PDF readers like PDFgear and Acrobat do not support printing multiple selections at once. You would need to print each selection separately or use a PDF editor to first extract or combine the desired areas into a new PDF.
How can I ensure that the printed portion is the correct size?
In the print dialog, you can usually adjust the scale or fit options. Make sure to preview the print to confirm that the size is as expected. You may have to select ‘Actual Size’ to avoid scaling the printout.
How do I print a portion of a PDF using Preview on macOS?
To print a portion of a PDF in Preview:
- Open the PDF in Preview.
- Use Tools > Rectangular Selection to select the area.
- Go to File > New from Clipboard to create a new document with the selected area.
- Print the new document by going to File > Print.