How to Extract Images from PDF [2 Simple Methods]

Summary :
Discover the methods to extract high-quality images from a PDF using either the free tool or Adobe Acrobat Pro. Follow the steps in each tool to get the best results.
Table of Contents

How to Extract Images from PDF
Most PDF viewers aren’t capable of extracting images effectively, often resulting in low-quality pictures. In this post, we’ll walk you through two simple methods with step-by-step instructions to quickly extract images from PDFs.
How to Extract Images from a PDF for Free and Directly
PDFgear offers a zero-cost image extraction feature. It allows you to get photos or logos straightforwardly from editable PDFs at high quality.
What’s more, PDFgear allows you to convert the whole PDF to JPG, or extract comments from PDF.
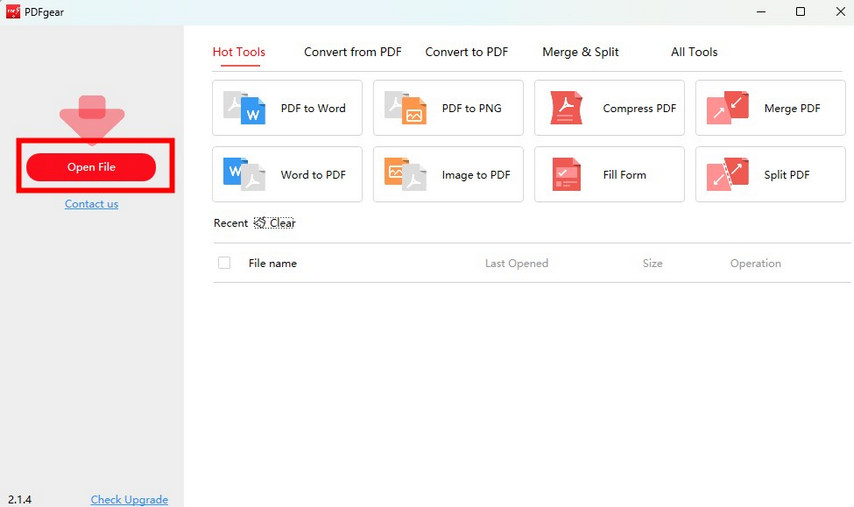
Step 1. Install and launch PDFgear on your Windows 10 or Windows 11.
Step 2. Click “Open File” and select a PDF to open.
Open a PDF in PDFgear to Extract Image
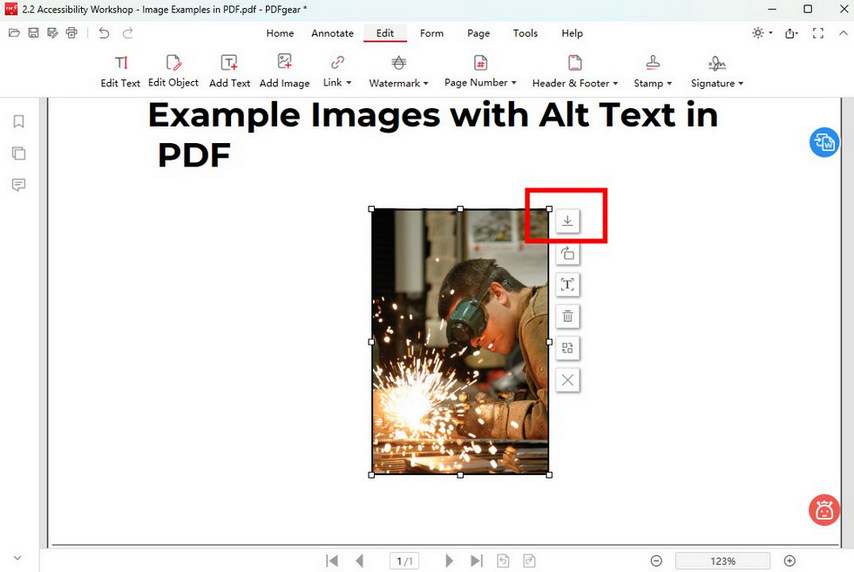
Step 3. Click the image > Click the Pen icon > Choose the down arrow icon “Save” on the right.
Step 4. In the pop-up window, customize the file name and save location for files > Press “Save.”
The pics are saved as JPG swiftly on your device.
Extract and Save Images from PDF in PDFgear
Usually, it’s infeasible to obtain pictures from a scanned PDF since the whole file is image-based. However, by using the screenshot feature of PDFgear, you can still get the images.
Find “Home” at the topmost toolbar > Click “Screenshot” > Click and drag to select the region of the image > Click “Done” or “Save.”

Screenshot Images on PDF in PDFgear
How to Extract Images from a PDF Using Adobe Acrobat Pro
Adobe is undoubtedly a popular choice, but its steep subscription fees can be a deal-breaker, especially for occasional users. If you’re already subscribed, though, here’s a quick guide to help you extract images effortlessly.
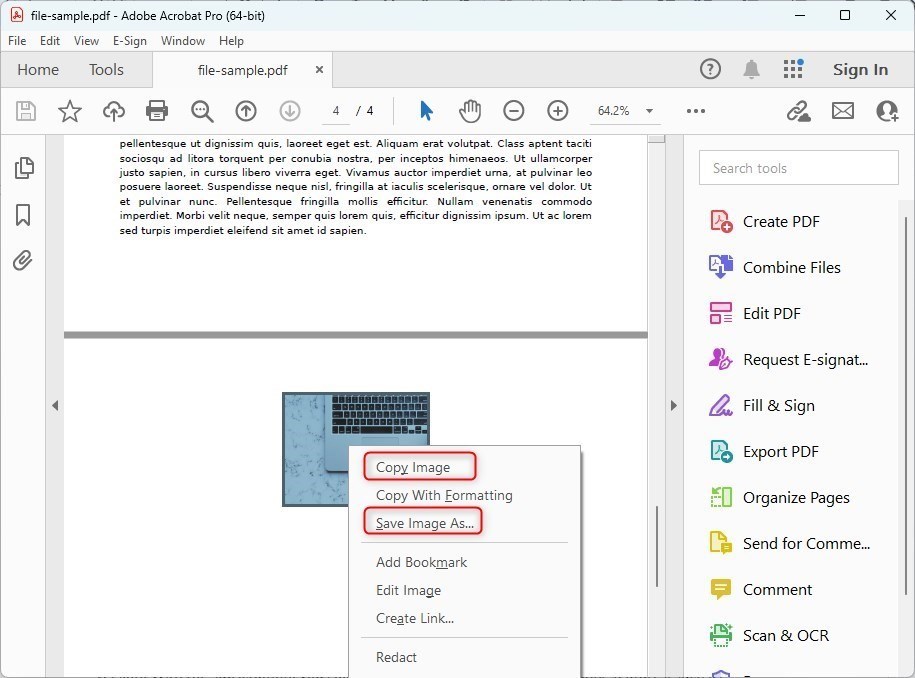
Step 1. Open the PDF containing images in Adobe Acrobat Pro. > Select the ‘Selection Tool for text and image’ from the toolbar. It looks like an arrow cursor.
Step 2. Scroll down to find the image you want to extract, and click to select it. > With the image selected, right-click inside the selection and choose ‘Copy Image’ or ‘Save Image As’ from the context menu.
Step 3. If copying, you can then paste the copied image into another document. If exporting, choose image format options like JPEG, TIFF, BMP, etc., and save the exported image file to your computer.
Copy and Export PDF Images with Adobe Acrobat
FAQs
What is the best tool to extract images from a PDF?
PDFgear is an excellent tool for extracting images from PDF files. This free PDF editor enables you to select and download images as new JPG files without quality loss. It’s user-friendly and performs tasks efficiently.
How do I cut out an image from a PDF?
To cut out an image from a PDF, you can use PDFgear. It is free and professional for capturing PDF screenshots. Get PDFgear for Windows or Mac > Select and open a PDF with the app > Go to “Screenshot” under the “Home” tab > Adjust the crop area > Tap the download icon to save the picture in PNG format.
How do I remove a specific image from a PDF?
To remove a specific image from a PDF, install PDFgear on your Windows or Mac device and open the PDF with the app. Locate the image you want to remove, then click the pen icon next to it. After that, select the bin icon to delete the image. Finally, save the PDF after making the change.
Can I extract images from a PDF and save them as JPG or PNG?
Yes. As mentioned in this post, you can extract the images from a PDF with PDFgear and save them as JPG files. PDFgear enables you to select and download PDF images and save them in JPG without quality loss.