How to Crop PDF to JPG for Free

Summary :
Learn how to crop PDF to JPG or extract images from PDFs using PDFgear, GIMP, and Adobe Acrobat. Free, offline, and high-quality solutions.
Table of Contents
When people want to know how to crop PDF to JPG, they’re usually referring to one of two needs:
- Crop PDF to JPG/PNG/Image: Trimming or resizing a PDF page and converting it into an image format for sharing, printing, or presentation.
- Crop an Image Out of a PDF: extracting only a portion of a page, such as a chart, photo, or signature, and saving it as an image file.
These two goals sound similar but require slightly different tools and workflows.
In this guide, you’ll learn how to handle both tasks using trusted solutions such as PDFgear, Online Converter, GIMP, and Adobe Acrobat. Each method is explained in simple steps so you can quickly and securely crop and save your PDFs to JPG.
By the end, you’ll know exactly how to crop PDFs into images or crop images out of PDFs with the right tool for your needs.
Crop and Convert PDF to JPG for Free
If you want a simple, reliable, and free way to crop a PDF and save it as an image, PDFgear is the best option. It combines a comprehensive PDF editor with a fast image converter, so you can complete the entire process in one place without switching tools or uploading files again.
The tool ensures the converted JPG retains its original clarity and layout, making it perfect for reports, presentations, or online uploads.
What sets PDFgear apart is its flexibility. Unlike Adobe Acrobat, which exports each page separately, PDFgear lets you choose whether to save your cropped file as a single combined image or as multiple JPG pages, depending on your needs.
1. Open your PDF in PDFgear.
2. Go to the “Page” tab, click “Crop Page”, drag to select the area, choose whether to apply it to all pages, and click “OK”.
3. Click “Save As” to create a new cropped copy (it opens automatically).
4. Go to the “Tools” tab, choose “Convert” > “PDF to JPEG”.
5. Set the Page Range, Output Path, Quality, and Color Mode, then click “Convert”.
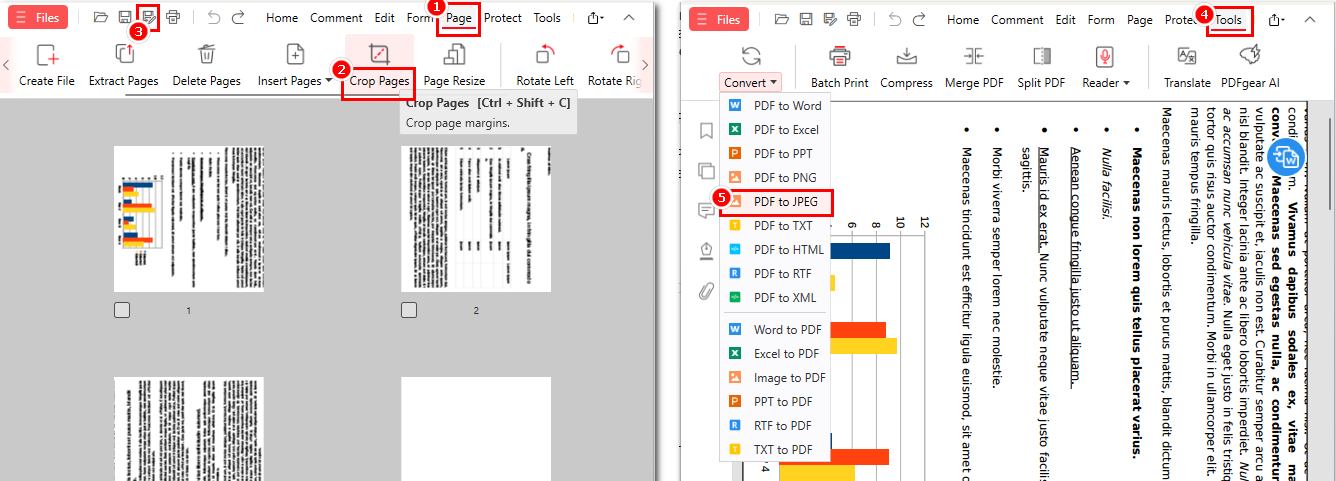
Crop PDF and Convert to JPG with PDFgear
PDFgear will instantly export high-quality JPGs and open the output folder for you.
Whether you’re preparing product screenshots, visual slides, or scanned documents, PDFgear gives you a fast, professional way to crop and convert PDFs to images effortlessly.
Crop and Convert PDF to JPG Online
If you prefer not to install software, PDFgear Online lets you crop and convert PDFs to JPGs directly in your browser. It’s free, requires no registration, and works on Windows, macOS, iOS, and Android.
Unlike most online tools that upload files to third-party servers, PDFgear Online processes everything locally, so your PDFs never leave your device. It also delivers high-quality JPGs without compression or hidden limits, while other tools like Smallpdf or iLovePDF often restrict export quality behind paywalls.
1. Visit the PDFgear Online Crop Tool.
2. Upload your PDF, drag and drop to select the crop area, choose “Apply Range”, and click “Crop”.
3. Download the cropped PDF.
4. Upload the cropped PDF to the PDFgear Online PDF to JPG Tool.
5. Wait a few seconds, then download the converted JPG images.
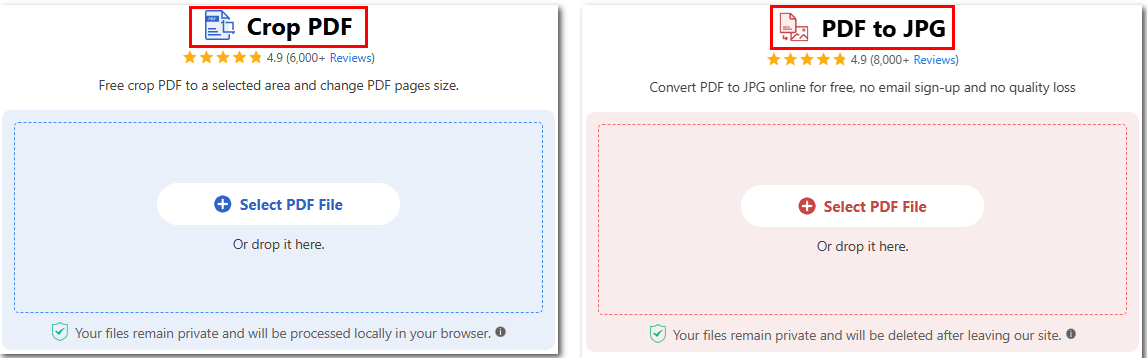
Crop PDF and Convert to JPG Online with PDFgear
Tip: The PDFgear online PDF to JPG converter automatically exports each PDF page as a separate JPG, so you’ll receive multiple images. If you’d like to combine all pages into one continuous JPG, download PDFgear to achieve this.
Crop an Image Out of a PDF for Free
Sometimes you don’t need to crop an entire PDF page but only want to save a specific part of it, such as a chart, logo, or signature. In this case, the Screenshot feature in PDFgear provides a quick and precise way to capture any area of a PDF page as an image.
The Screenshot tool works like a built-in snipping function inside the PDF editor. It instantly saves the selected area as a PNG image, making it perfect for users who want to extract visuals without performing a full crop or conversion.
1. Open your PDF in PDFgear.
2. Click the “Screenshot” icon in the toolbar.
3. Drag to select the area you want to capture.
4. Click “Save”, choose an output path, and click “Save” again in the pop-up window.
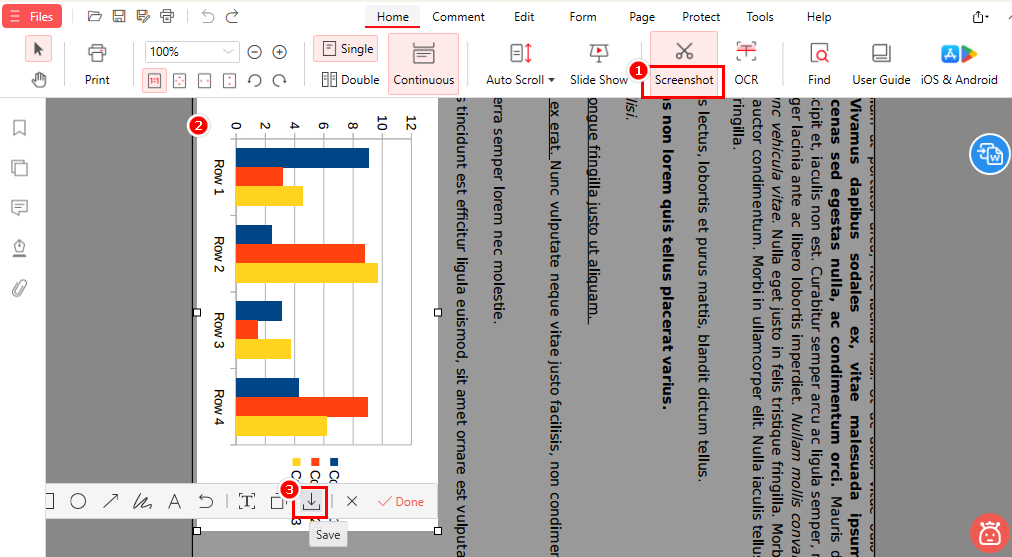
Crop PDF to Image for Free with PDFgear
The cropped section is automatically saved as a PNG file on your computer, and the output folder opens once the image is successfully saved.
Crop PDF to JPG Directly with GIMP
GIMP can crop a PDF and save it as an image in just one step, making it one of the most efficient free tools for this task. Unlike other programs that divide the process into two stages, cropping first and converting later, GIMP lets you crop and export a PDF directly as a JPG or PNG within a single workflow.
This unique advantage makes GIMP ideal for users who want speed, simplicity, and full control over their edits. In addition to cropping, it also offers advanced image editing tools such as layers, filters, and color correction, enabling you to produce professional quality visuals with precision.
1. Open GIMP and go to “File” > “Open”, then select your PDF.
2. In the pop-up window, choose the page you want to import.
3. Use the “Crop Tool” to select the area you want to keep, then left-click to apply the crop.
4. Go to “File” > “Export As” > “JPEG” (or PNG), name your file, and click “Export”.
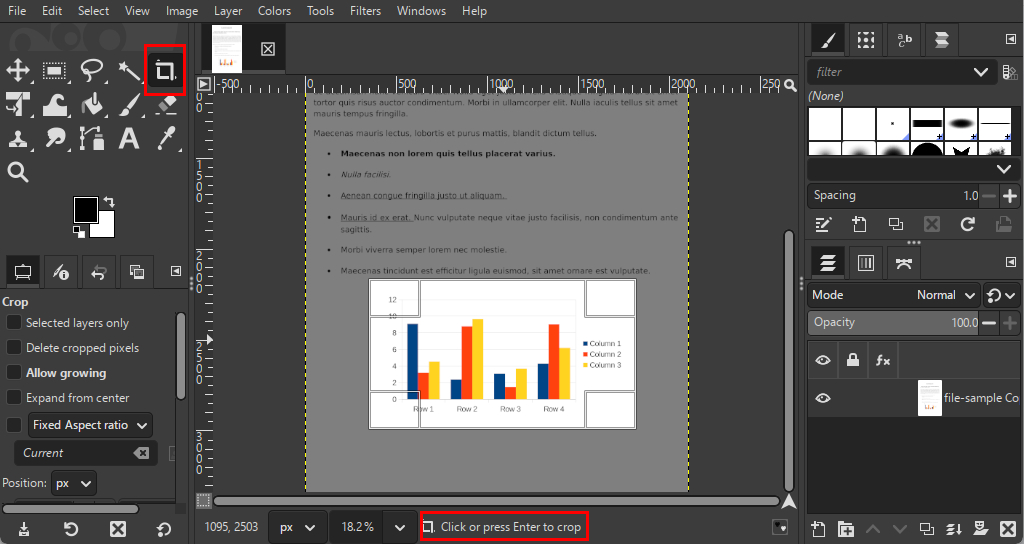
Crop PDF to JPG with GIMP
Tip: GIMP processes one PDF page at a time, so if your file has multiple pages, you’ll need to repeat the steps for each page.
Crop and Convert PDF to JPG with Adobe Acrobat Pro
If you have an active subscription to Adobe Acrobat Pro and need precise control over cropping and image quality, you can crop and convert PDFs to JPGs within the program. Acrobat Pro provides advanced export options that let you adjust resolution, compression, and color settings for professional results.
1. Open your PDF in Adobe Acrobat Pro.
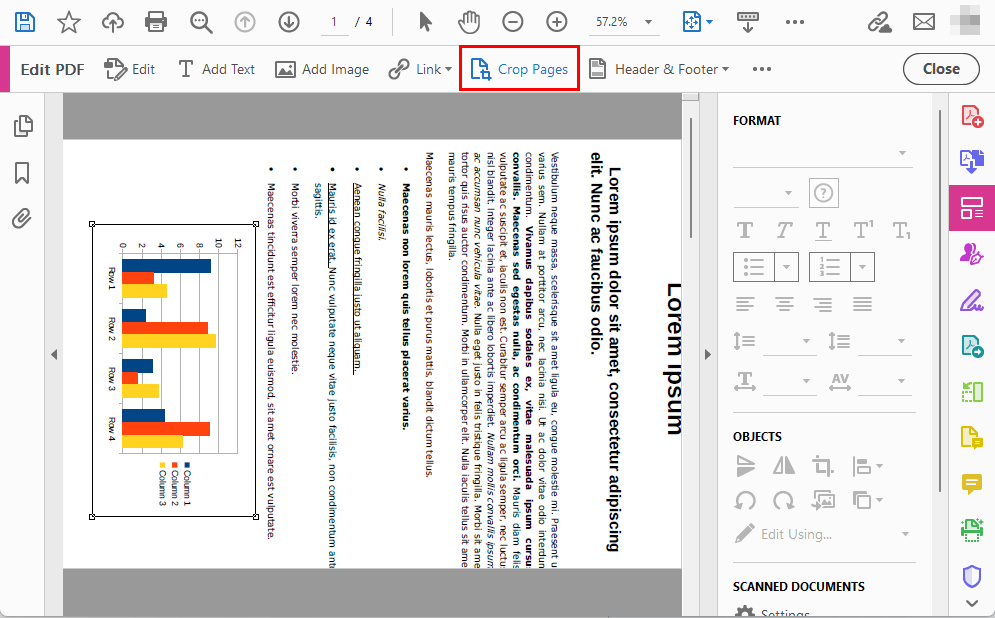
2. Choose “Edit”, click “Crop Pages”, and draw a box around the area you want to keep.
3. Double-click the selected area, choose whether to apply the crop to all or specific pages, then click “OK”.
4. Go to “File” > “Export To” > “Image” > “JPEG”.
5. Set the image quality, select the output folder, and click “Save”.
Crop and Convert PDF to JPG with Adobe Acrobat Pro
While Acrobat produces high-quality exports, it saves each page as a separate JPG and requires a subscription. PDFgear Desktop offers the same quality and flexible single or multiple page exports for free.
FAQs
What is the difference between cropping a PDF and cropping an image out of a PDF?
Cropping a PDF adjusts the visible area of the entire page before converting it into an image, while cropping an image out of a PDF means selecting and saving only a specific portion, such as a chart, logo, or picture.
Can I export cropped files as PNG instead of JPG?
Yes. PDFgear supports both JPG and PNG formats for export, allowing you to choose the format that best fits your needs. For detailed steps, see Method 3 above.
Does GIMP support multi-page PDFs?
No. GIMP can only open and edit one PDF page at a time, so you need to repeat the process for each page. If you want a more efficient solution, try PDFgear, which can batch process multiple pages at once.
What is the best free tool to crop and convert PDFs to JPGs?
PDFgear is the best free option because it combines cropping and converting in one seamless workflow to crop your PDF to JPG. It works completely offline and produces high-quality images with no watermarks or file limits. It also guarantees full file privacy, keeping your documents safe on your device.
How can I crop a PDF to JPG in high quality?
Use PDFgear to complete this task easily. Download PDFgear on your device and open your file. Go to “Pages” → “Crop PDF” to select the crop area, then save the cropped file. Next, go to “Tools” → “Convert” → “PDF to JPEG” to finish the conversion.
Can Adobe Acrobat export all pages into one JPG?
No. Adobe Acrobat Pro saves each PDF page as a separate JPG image. To export all pages into one combined JPG, use PDFgear, which offers this option for free.
Can I crop a PDF to JPG online for free?
Yes. You can use the PDFgear Online Crop Tool and PDFgear Online PDF to JPG Tool. Both work directly in your browser without registration and process files locally, ensuring your data stays private..
Conclusion
Cropping a PDF to JPG can mean converting entire pages into images or capturing just part of a page.
Compared with tools like Adobe Acrobat and GIMP, which either require a paid subscription or handle one page at a time, PDFgear provides a faster, simpler, and more flexible experience. You can crop pages, save them as JPG or PNG, or capture any part of a PDF using the Screenshot feature, all for free and offline.
For the best balance of speed, quality, and privacy, PDFgear Desktop is the ideal choice.