How to Convert PNG to PDF on Mac for Free

Summary :
Learn how to use PDFgear and Preview to convert PNG to PDF on a Mac, both online and offline.
Table of Contents
The PDF works on more devices and software than PNG, making it easier to share and collaborate on documents.
This post shows you three options. Read on to find the best method to convert PNG to PDF on a Mac.
Convert PNG to PDF on a Mac Online for Free
PDFgear lets you convert PNG to PDF in your browser on a MacBook for free. No sign-up, no limitations, and no watermark.
You can use our online PNG to PDF converter on any device, including Mac, Windows, iPhone, and Android. It also merges multiple images into one PDF.
Step 1. Go to PDFgear online PNG to PDF converter from Safari or Google Chrome on your Mac.
Step 2. Click “Select Image Files” or drag and drop images into the drop zone.
Step 3. Adjust page size and orientation if needed. You can also rearrange the images by dragging them into the desired order.
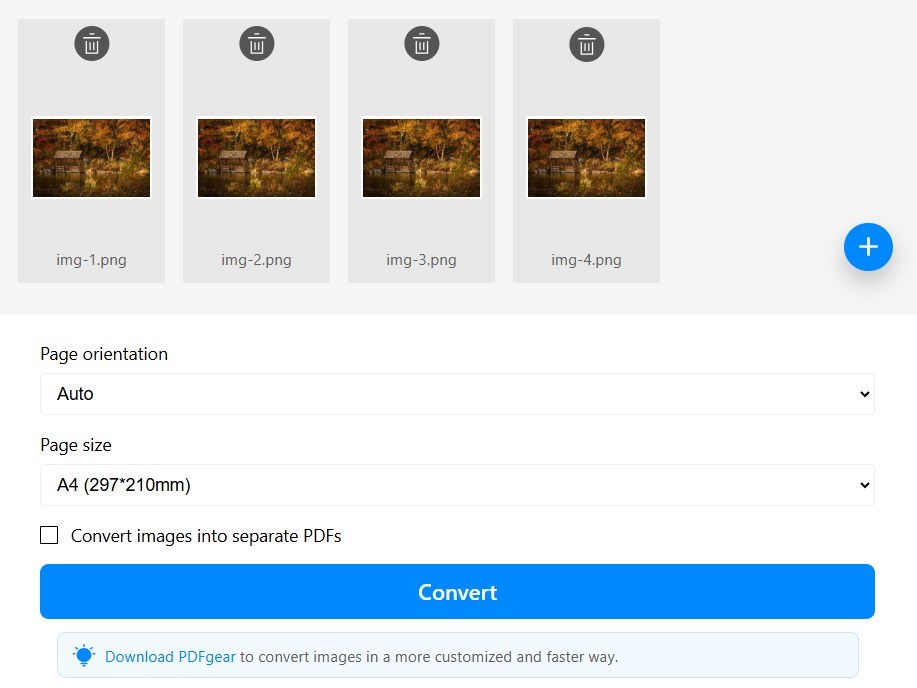
Customize the Image Settings
To save each image as a separate PDF, enable the “Convert images into separate PDFs” option.
Step 4. Click the “Convert” button and let PDFgear work its magic.
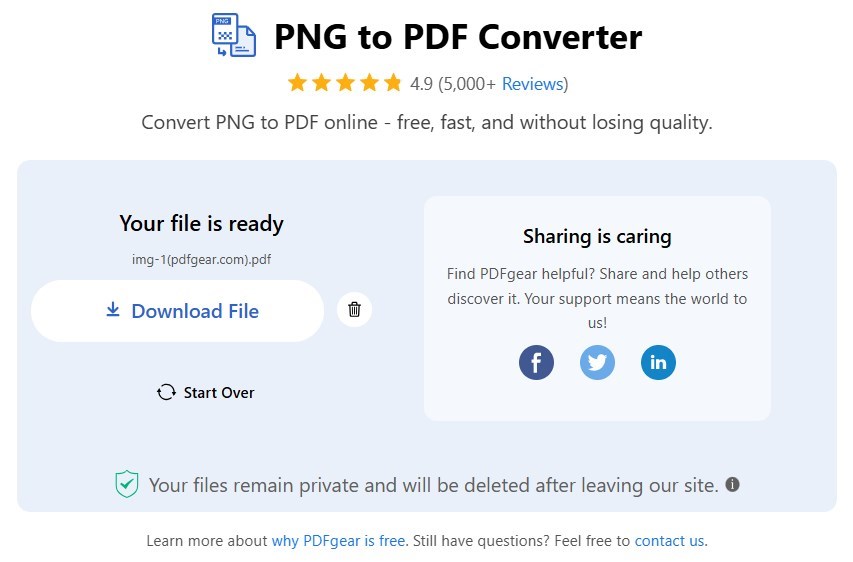
Download the PDF File
Step 5. Voila! Click the download button to save the PDF.
Convert PNG to PDF on Mac Offline with PDFgear
For better privacy, PDFgear also provides an app to convert PNG or JPG images to PDFs offline on your MacBook Pro and MacBook Air. It supports high-quality conversion, keeping your images clear in the final PDF.
You can adjust the page size, margins, and orientation to fit your needs. It also supports batch conversion, so you can process many images at once.

Step 1. Download and install PDFgear for Mac on your device.
Step 2. Open PDFgear, select “Convert to PDF,” and choose “Image to PDF.”
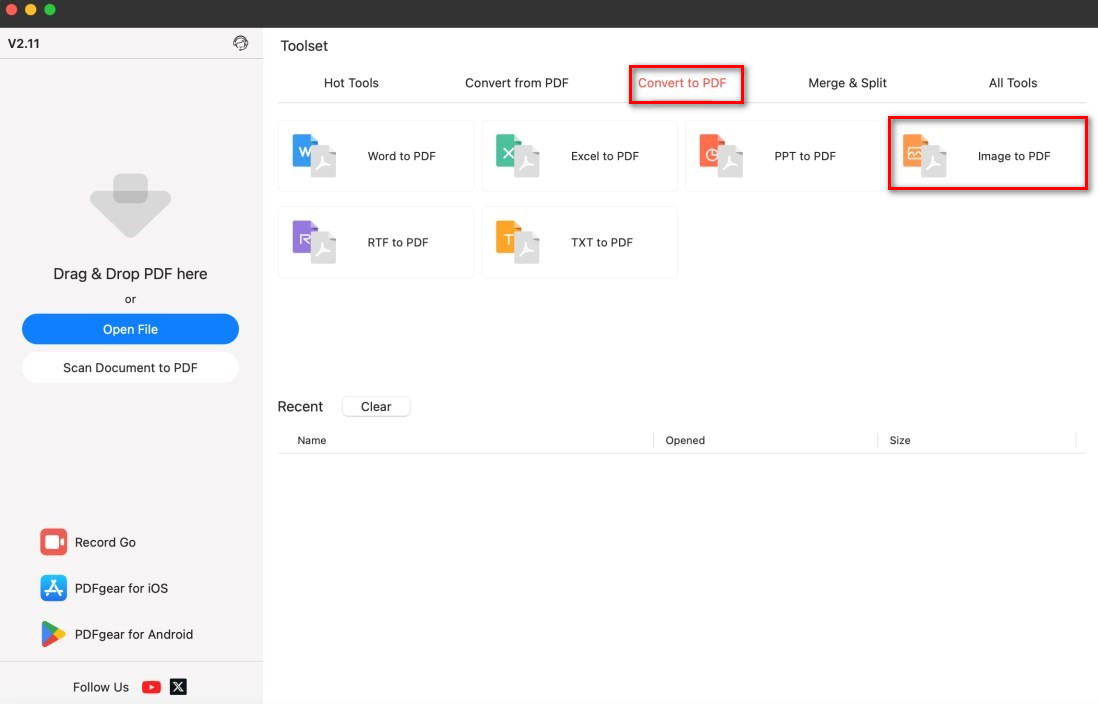
Open the Image to PDF Tool
Step 3. Click “Add Files” and choose one or more PNG images to add. Arrange the images in the desired order.
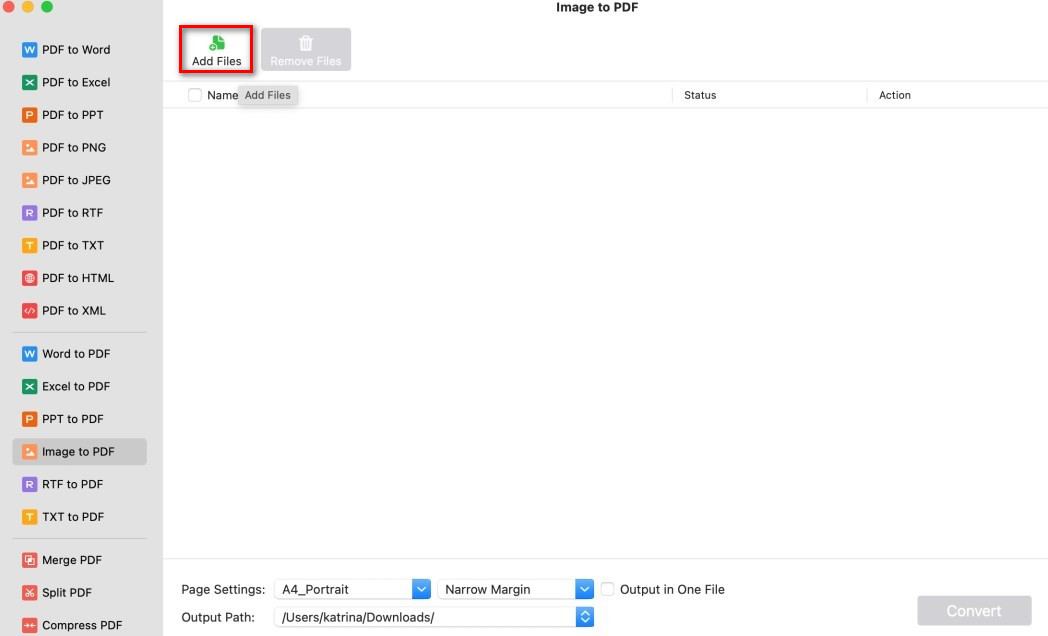
Add Images to Convert to PDF
Step 4. Select the page size (A4, A3, etc.), set the orientation (portrait or landscape), and adjust margins if needed.
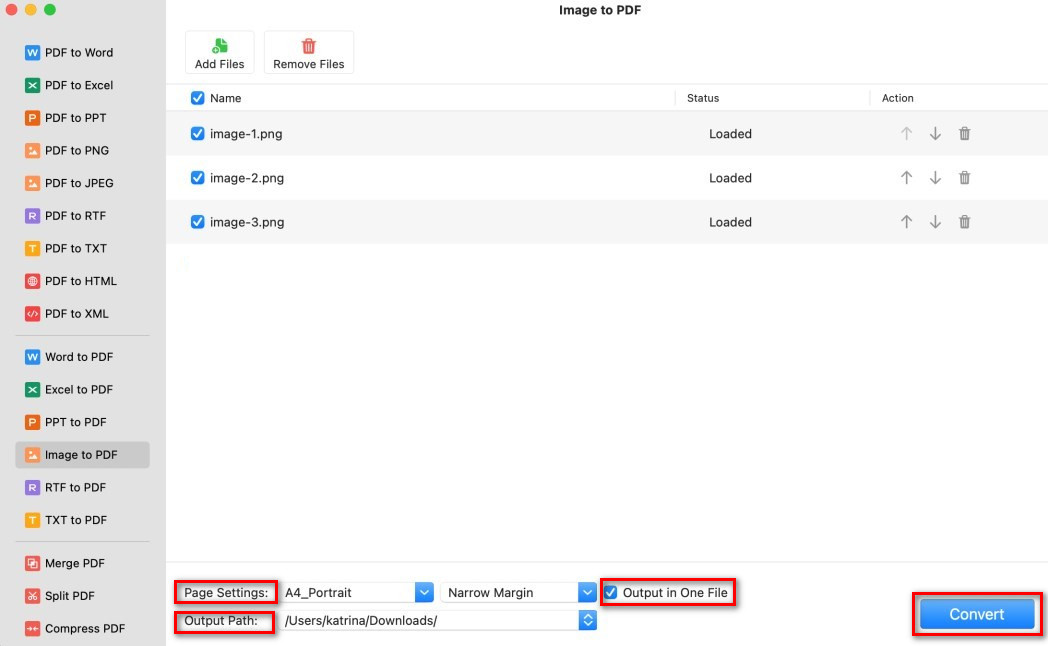
Batch Convert Image to PDF on Mac
To merge all images into one PDF, check the “Output in One File” option. Otherwise, each image will be saved as a separate PDF.
Step 5. Click “Convert” and wait for PDFgear to complete the process.
Convert a PNG to a PDF on Mac with Preview
Preview is a free app that comes with every Mac. It lets you open, edit, and convert images and PDFs. You can use it to turn a PNG into a PDF in just a few steps.
Step 1. Locate the PNG file in Finder and double-click it. (By default, it should open in Preview.)
Open an Image with Preview
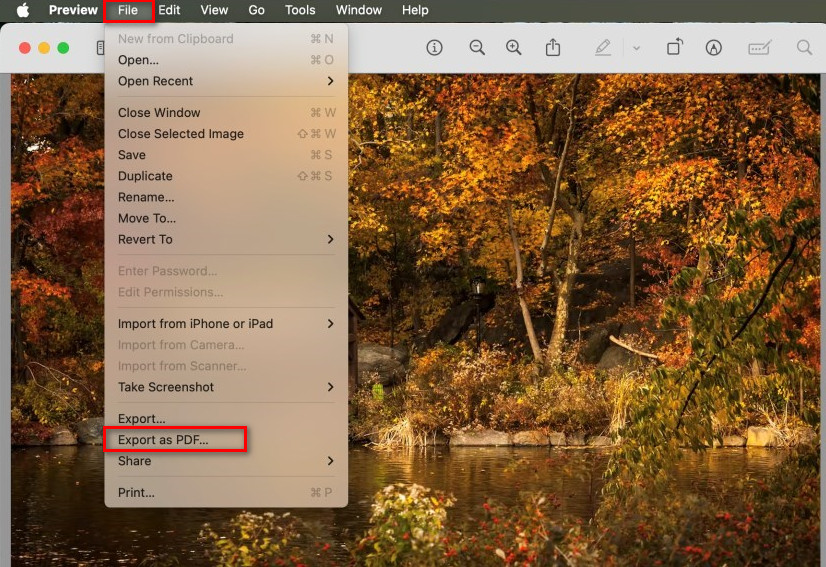
Step 2. In Preview, click “File” in the top menu bar and select “Export as PDF” that appears in your menu.
Step 3. If you choose “Export,” select “PDF” under “Format” in the dialog window.
Export JPG as PDF on Mac
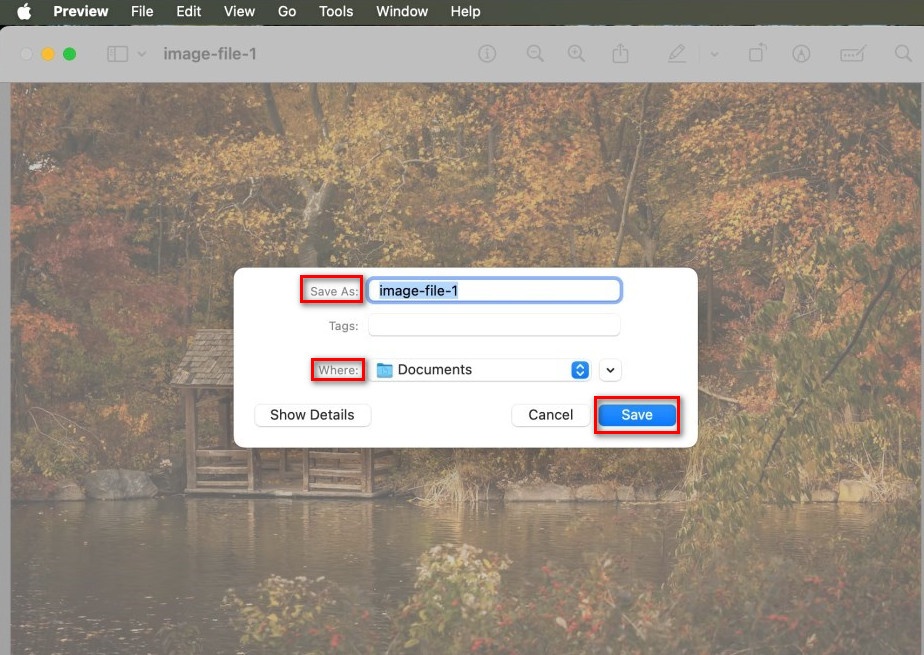
Step 4. Name your file, choose a save location, and click “Save.”
FAQs
What is the best way to convert PNG to PDF on Mac?
The table below compares three popular options to convert PNG to PDF on Mac: Preview (built-in), PDFgear (free software), and PDFgear Online (web tool). This will help you choose the best method for you.
| Feature | Preview (Mac Built-in App) | PDFgear (Free Software for Mac) | PDFgear Online Converter |
| Installation Required | No (Pre-installed on Mac) | Yes (Download needed) | No (Web-based) |
| Works Offline | Yes | Yes | No |
| Batch Conversion | No | Yes | Yes |
| Image Quality | Standard | High | High |
| File Customization | Basic (Resize, Rotate) | Advanced (Margins, Page Size) | Limited |
| Combining Multiple PNGs | Yes | Yes | Yes |
| Free to Use | Yes | Yes (No watermark) | Yes (No watermark) |
| Best For | Quick, simple conversion on Mac | High-quality, offline PDF editing | Fast, no-install conversion from any device |
Will converting a PNG to PDF affect image quality?
No, converting a PNG to a PDF with PDFgear does not reduce image quality. PDFgear preserves the original resolution, ensuring the converted PDF looks just as clear as the PNG file.
Will the transparent background of a PNG remain in the PDF?
PDFs do not inherently maintain transparency. In most cases, the transparent area of a PNG becomes white in the PDF.